
With our second of three weeks coming to a close, the externs are working hard to get their projects finished. While Belle is still busy with the pollinator database, Audrey and Jackie have been desperately trying to finish processing all the randomly sampled heads from the remnant prairie populations. This processing isn’t quick–that’s why it’s taken up the majority of our externship. As mentioned previously, processing has five steps: cleaning or dissecting the head to get all the achenes out, scanning the achenes, counting the achenes, randomizing a sample of the achenes to x-ray, and finally x-raying the achenes for the presence of seeds. Now that we’re finally done with all of the cleaning, we’ve been focusing on scanning, counting, and randomizing so that we can get x-raying next week. Here’s a behind-the-scenes look at how we’ve been doing these steps:
The scanning is just how it sounds: we very carefully pour the achenes out onto a standard office scanner and get an image of them. This image is what we use for counting. It may seem superfluous to scan the achenes and count from the image when we could count the achenes themselves, but when heads often have more than 200 achenes, it’s tough to accurately count by hand. Computers are much better of keeping track of what number they’re on, so we let them do the work. Once the image is scanned, we just have to click on each achene we see in the image and it’s marked with a dot. The computer keeps track of the number of dots. That way, you know you haven’t missed any achenes and that your number is accurate. Here’s Jackie, in action counting:

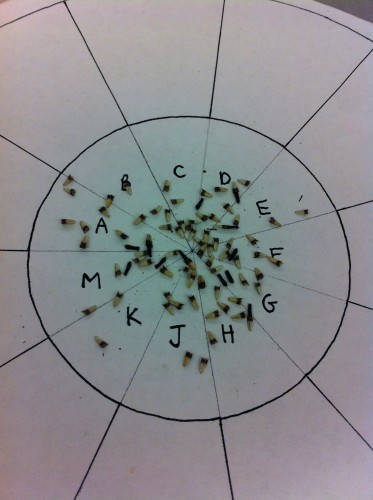
After scanning, I’ve been taking the achenes and randomizing them. In other words, I’ve been taking all the achenes from the middle of the head and taken a random sample of 1/6 of all the middle achenes. This is done pretty simply: you take the achenes and pour them out onto a circle divided into wedges and labeled with letters. Then, from a list random letters, you determine which wedges you’re taking achenes from. For the picture below, for example, the achenes chosen for x-raying were from wedges G and H:
If you think these steps sound a little tedious, you’re right. But, we’re hoping all this processing leads to some really interesting data to analyze next week!