|
|
A protocol for Team Video is in the early stages, and there are many aspects to consider. While it started slow, we have found a relatively quick and efficient system for placing cameras, taking down and storing cameras, and uploading videos. Unfortunately, many additional challenges await.
Watching the 2+ terabytes of footage will be a long and arduous task, and it is therefore key to plan well in these early stages. I believe the most important questions to ask at this phase are:
What data are we looking to collect?
With so much footage we have captured a lot of different things that we could potentially measure. We can see thrips on nearly every head we’ve recorded. We also have seen many ants, though typically of only two main species. Previous hypotheses about the roles of these ants have been posted, and the videos of the flowering heads would be a great resource for anyone wanting to find out more about them. As of now (though I’m not entirely sure as I haven’t thoroughly consulted with the rest of Team Video) I believe we are only going to record information about the insects that visit the heads and not their permanent residents.
What is the most effective/efficient way to collect these data?
This project cannot be done quickly or easily. Every day that we record in the Common Garden we get about 7-9 hours of footage per camera. With ten cameras rolling that is 70-90 hours of footage to watch per day. If we record for 5 days in a week (not uncommon) we then have 350-450 hours. That’s a freakin’ lot of video! Efficiency is key, but as a wise man once said “We’re looking to increase efficiency without losing accuracy”.
It is at these questions that I hit a wall, and would appreciate the input of my fellow bloggers/fans of the blog. As of now we have been using a video player that has the capacity to fast forward at speeds up to 32x, where should the line be drawn? At some point well below the 32x speeds, we might start missing things. Some bees only remain on the flower for a second or two before leaving, and the watcher of these videos may not catch these visits. However, there is really no way to watch these videos at normal speeds and expect to finish before the end of the decade (let alone the end of the summer). Also, a question directed at fellow Echinacea team members; are there data that you would like to be gathered from these movies that I haven’t mentioned? The ball has been passed into your court…
Our initial protocol for painting bees called for painting bees as they were collecting pollen on the flower heads using a small paintbrush. Before starting painting, we had created “paint bandoliers” that consisted of microfuge tubes filled with different colors of paint and then taped in a line with duct tape to keep them together. We ordered the colors according to the rainbow to make it easier to keep track of the colors. Each color was given a three letter abbreviation. Painting the bees with paint brushes was fairly easy, but the shape and thickness of the dot had the possibility of being very variable. After researching bee painting, in particular queen honeybee marking, it appeared that the ideal dot that would last the longest amount of time is circular and uniformly thin. To obtain this ideal dot, it was suggested that a piece of wire whose diameter was the size of the desired dot be used.
We made new painting implements based on this information. We cut the wire on flags into about 15 cm sections, sanded one end flat, and then made handles for them from sticks and tape. We bent the sanded end about 45 degrees roughly 2.5 cm from the end so that we would be able to more easily paint the bees. At this point we were only marking Agapostemon virescens. It proved to be harder to paint them with the new tools as they were collecting pollen from the flowers. We had problems both getting a good dot on their thorax and also avoiding painting any other part of the bees, which would then decrease their survivability. We eventually planned on painting Melissodes. If we started painting them as well as A. virescens, we anticipated more problems with painting them on the flower heads because it appeared that they spent less time on the flower heads and moved faster and more jerkily while on the heads than A. virescens.
After a few poor painting jobs, we decided to chill the bees. The new protocol which proved effective was to catch 2-3 bees as we walked the random rows and then place them in labeled vials. These vials were placed in small lunchbox coolers that had ice packs in them. At first we used both glass and plastic vials, but we found that the glass vials worked better because the glass got cold while the plastic did not. We initially had 1 ice pack in each cooler and this worked fine for a little while, but once the ice pack was no longer very cold, we had problems with bees simply flying away before they could be painted or moving around too much for an easy paint job. To remedy this problem we started using two ice packs per cooler, which helped.
I found that the best way to continue to keep the bees cold was to paint the bees while they were still sitting on the ice pack. I left the ice pack in the cooler and placed a plastic bag on top of it. I did this so that the bee would not get wet from the condensation on the ice. This method worked rather well and the bees were usually very sedated and easy to paint. Working with the bees in the cooler also shielded them from the sun, keeping them cooler. One difficulty was making sure that the bees did not simply roll over on their backs in their stupor and smear the paint spot. Painting the bee on ice worked very well, but it also caused the ice packs to not last quite as long. It would be a good idea to have several other ice packs on hand in a larger cooler for when the first ones lost their coldness.
After painting a bee, we gently removed it from the cooler while it was on the plastic bag and allowed it to warm up in the sun, at which point it flew away. We released all of the bees within a few meters of where they were captured.
Pictures of equipment and painting will be posted once Andes has internet
The frequency of bee sightings has slowed down in the past couple of days, but in the mean time we have been typing up our updated protocols, and begun looking at the data that we’ve collected. Read on for detailed protocols, the musings of this year’s Bee Team, and tips for next year’s Bee Team.
Bee Tracking
After we had painted a sufficiently large number of bees, we transitioned to tracking their flight paths between Echinacea heads. Our goal with this project was to obtain data that would allow us to determine average flight path distance of the pollinators between heads and therefore get a better idea of gene flow within the garden, and also to see if we could estimate the home range size for individual bees.
Our protocol for tracking bees didn’t undergo too many changes from the initial version. The biggest challenge that we ran into was keeping up with the bees both visually and in terms of taking data. We updated the visor form several times to increase the efficiency of the data taker. The current form seems to work well, although we’ve considered the idea of taking data on paper. It would also streamline data processing if the visor/paper form could assign and group each flight series by an ID number.
We found that it was most effective to work in groups of at least three, and up to five. One person would be data taking on the visor, and the others would be visually following the bee. It was best for the trackers to stay back a couple of meters from the bee so as not to scare it, and for the trackers to be spread in a circle around the bee, so that it could be tracked in any direction. When the bee left the flower, the trackers would call to the data taker that the bee had left the head, so that they could prepare a new data point in the visor, and would then call out the new plant coordinates and twist-tie color. If the bee visited multiple heads on one plant, the second, third, etc. twist-tie colors were recorded in the notes instead of calling up a new form every time. If the bee was lost for more than ten seconds, we marked lost track, and then would resume with a new flight ID for the next bee, even if it was the same bee that we had previously been tracking.
Because we got all the details of this protocol worked out after the peak flowering, there weren’t many bees still in the garden when we were searching for them. As a result, we tended to concentrate our searching for bees in the ’96 garden where the flowering plant density was the highest. This made the most efficient use of our time, since we weren’t randomly walking rows with few or no flowering plants, but resulted in a data set that is concentrated in one place. Therefore, our data, especially when it comes to home range estimates, may be inaccurate, as we concentrated our time in the one area.
Miscellaneous Info
We the members of the Bee Team (formerly Team Binocular) have done our best to track, mark, and record the position of bees in the common garden for the last several weeks. Our first suggestion is that you start early. This year we got a late start compared to the Echinacea flowering. We also had to figure out all the protocol from scratch as well so in the future this project can get organized shortly before flowering starts to be ready when flowering starts. Pollen set and bee activity are closely related and are both tied to weather.
After trial and error, we found that the best time for finding bees in the common garden was right around 7:30. Agapostemon virescens tended to be out earlier in the morning while the Melissodes were out later. We hoped that by getting out early we would be able to find A. virescens to track, but because of the late start of our project, we were unable to find any. Cold weather and windy weather both diminished the number of bees visiting flower heads. Wind also made it difficult to track bees because when the bees took off from the flower head they were caught by the wind and blown away.
Here are some preliminary instructions on how to observe and record bee/ant presence or absence while we are doing phenology measurements. I thought that while we are looking so closely at each head, we might as well try to garner some information on the Hymenopteran vistors as well. It will not be continuous data, but rather a simple ‘yes’ or ‘no’ measurement for each plant (bees) or for each head (ants).

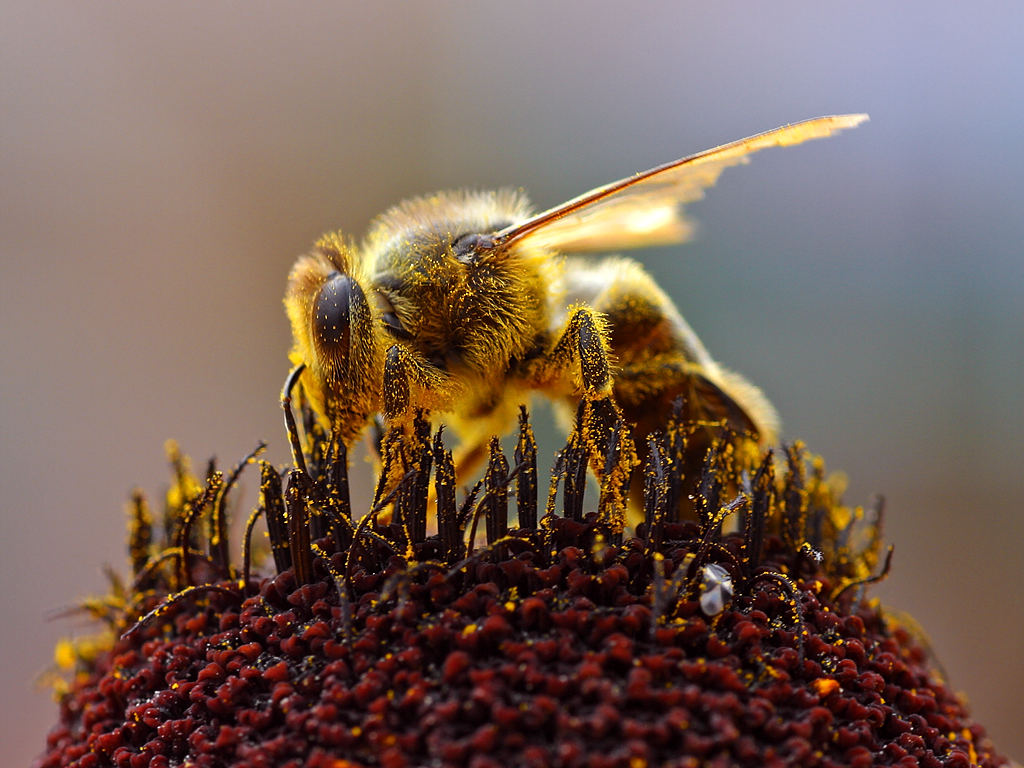
Bee collecting composite pollen, copyright Jon Sullivan
For BEES:
As you begin your phenology measurements only scan for bees once you are within 1m of the plant. If there are any moving, active bees on any head, mark the appropriate box in your phenology form. As soon as you touch a head for phenology measurements, stop recording any bee presence/absence. So, if you are looking at a head and a bee lands on an adjacent head, just ignore it. For bees, we are interested in bee presence for the ENTIRE plant, so as soon as you see one, you are finished entering data.
Remember, wee are only interested in active bees, so don’t count sleeping bees, dead bees, bees caught by crab spiders or assassin bugs, etc.

Ant, copyright Alex Wild
For ANTS:
Ant data are collected on a per-head basis. As you take each head into your hand and begin your anther count, notice if you see any ants on the top of the inflorescence (either ray OR disk florets). Don’t make any special effort at looking underneath the inflorescence. If no ants make an appearance as you are handling the head, mark the head as having no ants, if ANY ants appear whilst you are searching the head, enter the data as such.
Andy
Tomorrow marks the official kick-off day for the Bee Team. We plan to mark several species of generalist bees found in the common garden with paint spots on the thorax. Our painted bees will hopefully provide data that will answer questions about their population size in the common garden, home ranges of individual bees, and flight path distances between echinacea heads. Before we begin marking our bees tomorrow, we need to:
-find and/or make nails with rounded ends with which to paint the bees (nails are the recommended tool, according to Ian’s online research, as they transfer thin, even circles) and
-make a pendragon form for the visors with which to collect data (this form should include date, time, bee species, paint color, plant on which the bee was originally observed, and a place for notes)
Equipment needed:
paint bandoliers
nails/other paint applicators
visors
list of random numbers
Tomorrow’s protocol:
1. Generate a list of random number 10-56. Distribute evenly divided lists of these numbers to the 2 groups of 2 people participating. Walk the rows of the common garden in the perscribed order with one person on each side of the row, scanning the row for Agapostemon virescens
2. When a bee is sighted, paint a circle circle on its thorax. After painting radio/yell to the other group and relay the color used, so as to avoid doubling up on colors.
3. Record data for each painted bee into the pendragon form on the visor
Depending on the success of our painting efforts in the morning, we will maybe begin to collect data for home range and population size estimates.
Here is a draft for the video protocol. I’d love any useful comments you may have; it is definitely a work in progress, so if you read something and it isn’t clear, please let me know and I will change it. Thanks, A.M.
Protocol for recording pollinators:
v.1.0 (Jun 27 2007)
Equipment:
List of heads to video
A few (~5) pin flags
Five 3 x 5 in. cards and a sharpie
Set of camcorders and battery packs
A radio
1. Get a list of heads that need to recorded from Andy the evening prior to the actual recording date. Each person will be responsible for 3-4 heads for that recording day.
2. Get to the farmhouse at 8am sharp so that you can start recording for sure by 9am.
3. Make a list of ‘cue cards’ for each head that you are to record. This involves writing:
plant location (row and position), color of twist tie and date on a 3 x 5 in. card. This is the first thing you will ‘film’ when going out to the CG, so that we can match up videos to the correct file.
4. Go to each head on the list and make sure that it is still flowering. If not, then add another plant (we’ll supply > 5 heads per list), and make a note that the originally selected head is not flowering. If the plant IS flowering, then place a flag next to it so that you can find it easily. Go to the next head on the list.
5. Next, get the correct camcorder and battery (labeled A-J), put it on a tripod and put it in position over the inflorescence (head). The ideal distance is about 1 ft. away from the head with the camera zoom at about ½ max. zoom. You should be able to see the entire head; try to imagine identifying bees using your recorded image and adjust accordingly. Take a quick video of your ‘cue card’ for each head and then turn off the camera.
Set up all of your cameras first, before starting to record for pollinators. We want to start them all at the same time, so you will need to coordinate with other members of TEAM VIDEO to start synchronously (using your radios).
Make sure that there are no big branches, stems, twigs, etc. that could possibly wave in front of the camera, thus obscuring the inflorescence.
6. At more or less the same time, go to each camera and press the red ‘record’ button. Then, skedaddle away so that you don’t influence the pollinators!
7. At 4pm, go and stop each camera. Disconnect the batteries and return the camcorders and batteries to Andy. He’ll upload the video to a PC and re-charge the batteries for the next round of filming!
Mowing went well today. The crew did a good job. I have some notes:
Rows 10 – 33 got blasted from the east by the grass clipping etc from the mower.
Rows 35 – 56 got blasted from the west.
Row 34 didn’t get blasted. Row 34 was chosen at random, row 38 was chosen last year. Each year before 2006 I blasted the whole garden from either the east or the west. That was too inefficient.
Here’s the schedule of not-to-be-blasted rows for the next few years:
year row
2008 31
2009 39
2010 36
2011 28
2012 34
2013 27
2014 32
2015 29
2016 35
2017 37
2018 30
I ran over 4 flags (loose or bent) and didn’t hit any rocks. There aren’t very many new gopher mounds. Look for new mounds far N, Row ~ 35, Pos ~925, and Row 56. I don’t think I ran over any Echinacea plants. I was running blind in R~40-42, up to P935, and P865 in R10-12. Also, I had to add flags in R 10 far N. The brome is flowering super thick this year. The CG looks so different from last year because of the brome. Some brome infl are eye-level W of the garden in pos <910! Those fence posts in R 13.5 and ~38.5 are annoying and must go. The cottonwoods need to go to too--too much shade. Deal with trefoil & phalaris.
I can think of some things I will do differently next year. I’ll only do them next year if I remember. Next year I’ll have to look at this flog to find the unblasted row. Here’s the plan.
Preparation:
in fall, leave flags in the 98 garden or put in staples
get flags delivered in plenty of time (consider color coordination)
30″ are much better in non-burn years
sharpen blade, buy gas
mow entry paths & set up stairs
flag perimeter & unblasted row
mow perimeter
mow aisle on both sides of unblasted row
Orientation (print maps beforehand):
wear safety glasses, ear protection optional
place flags 10cm N of each plant
search for plants or staples
emphasize that plants can be difficult to find, but the goal isn’t to find every one (measure if necessary to get good coverage in thick areas)
walk E & W in unmowed areas & anywhere on mowed areas
lift legs over rows
pull pins & collect plastic
start flagging in positions 860, 935, 960, 983, then flag on either side of unblasted row
coordinate so rows are flagged before mowing
after a few rows, get folks working rows 50 – 56 & 10 – 16. Don’t bother flagging cg96.
Remove duff from all plants in an organized fashion.
Equipment:
flag bags
meter sticks (we need more, we only have six)
safety glasses
ear protection
mower sharp blade
gas
gloves for all & gloves for SW. Get the XL; L is too small.
Plan to spread mowing over two days to avoid exhaustion. Sharpen blade in between.
After duff is removed weed thistles, sweet clover, trim shrubs & trap gophers.
To do–cut cottonwoods, ashes in ditch, trees E of CG.
|
|