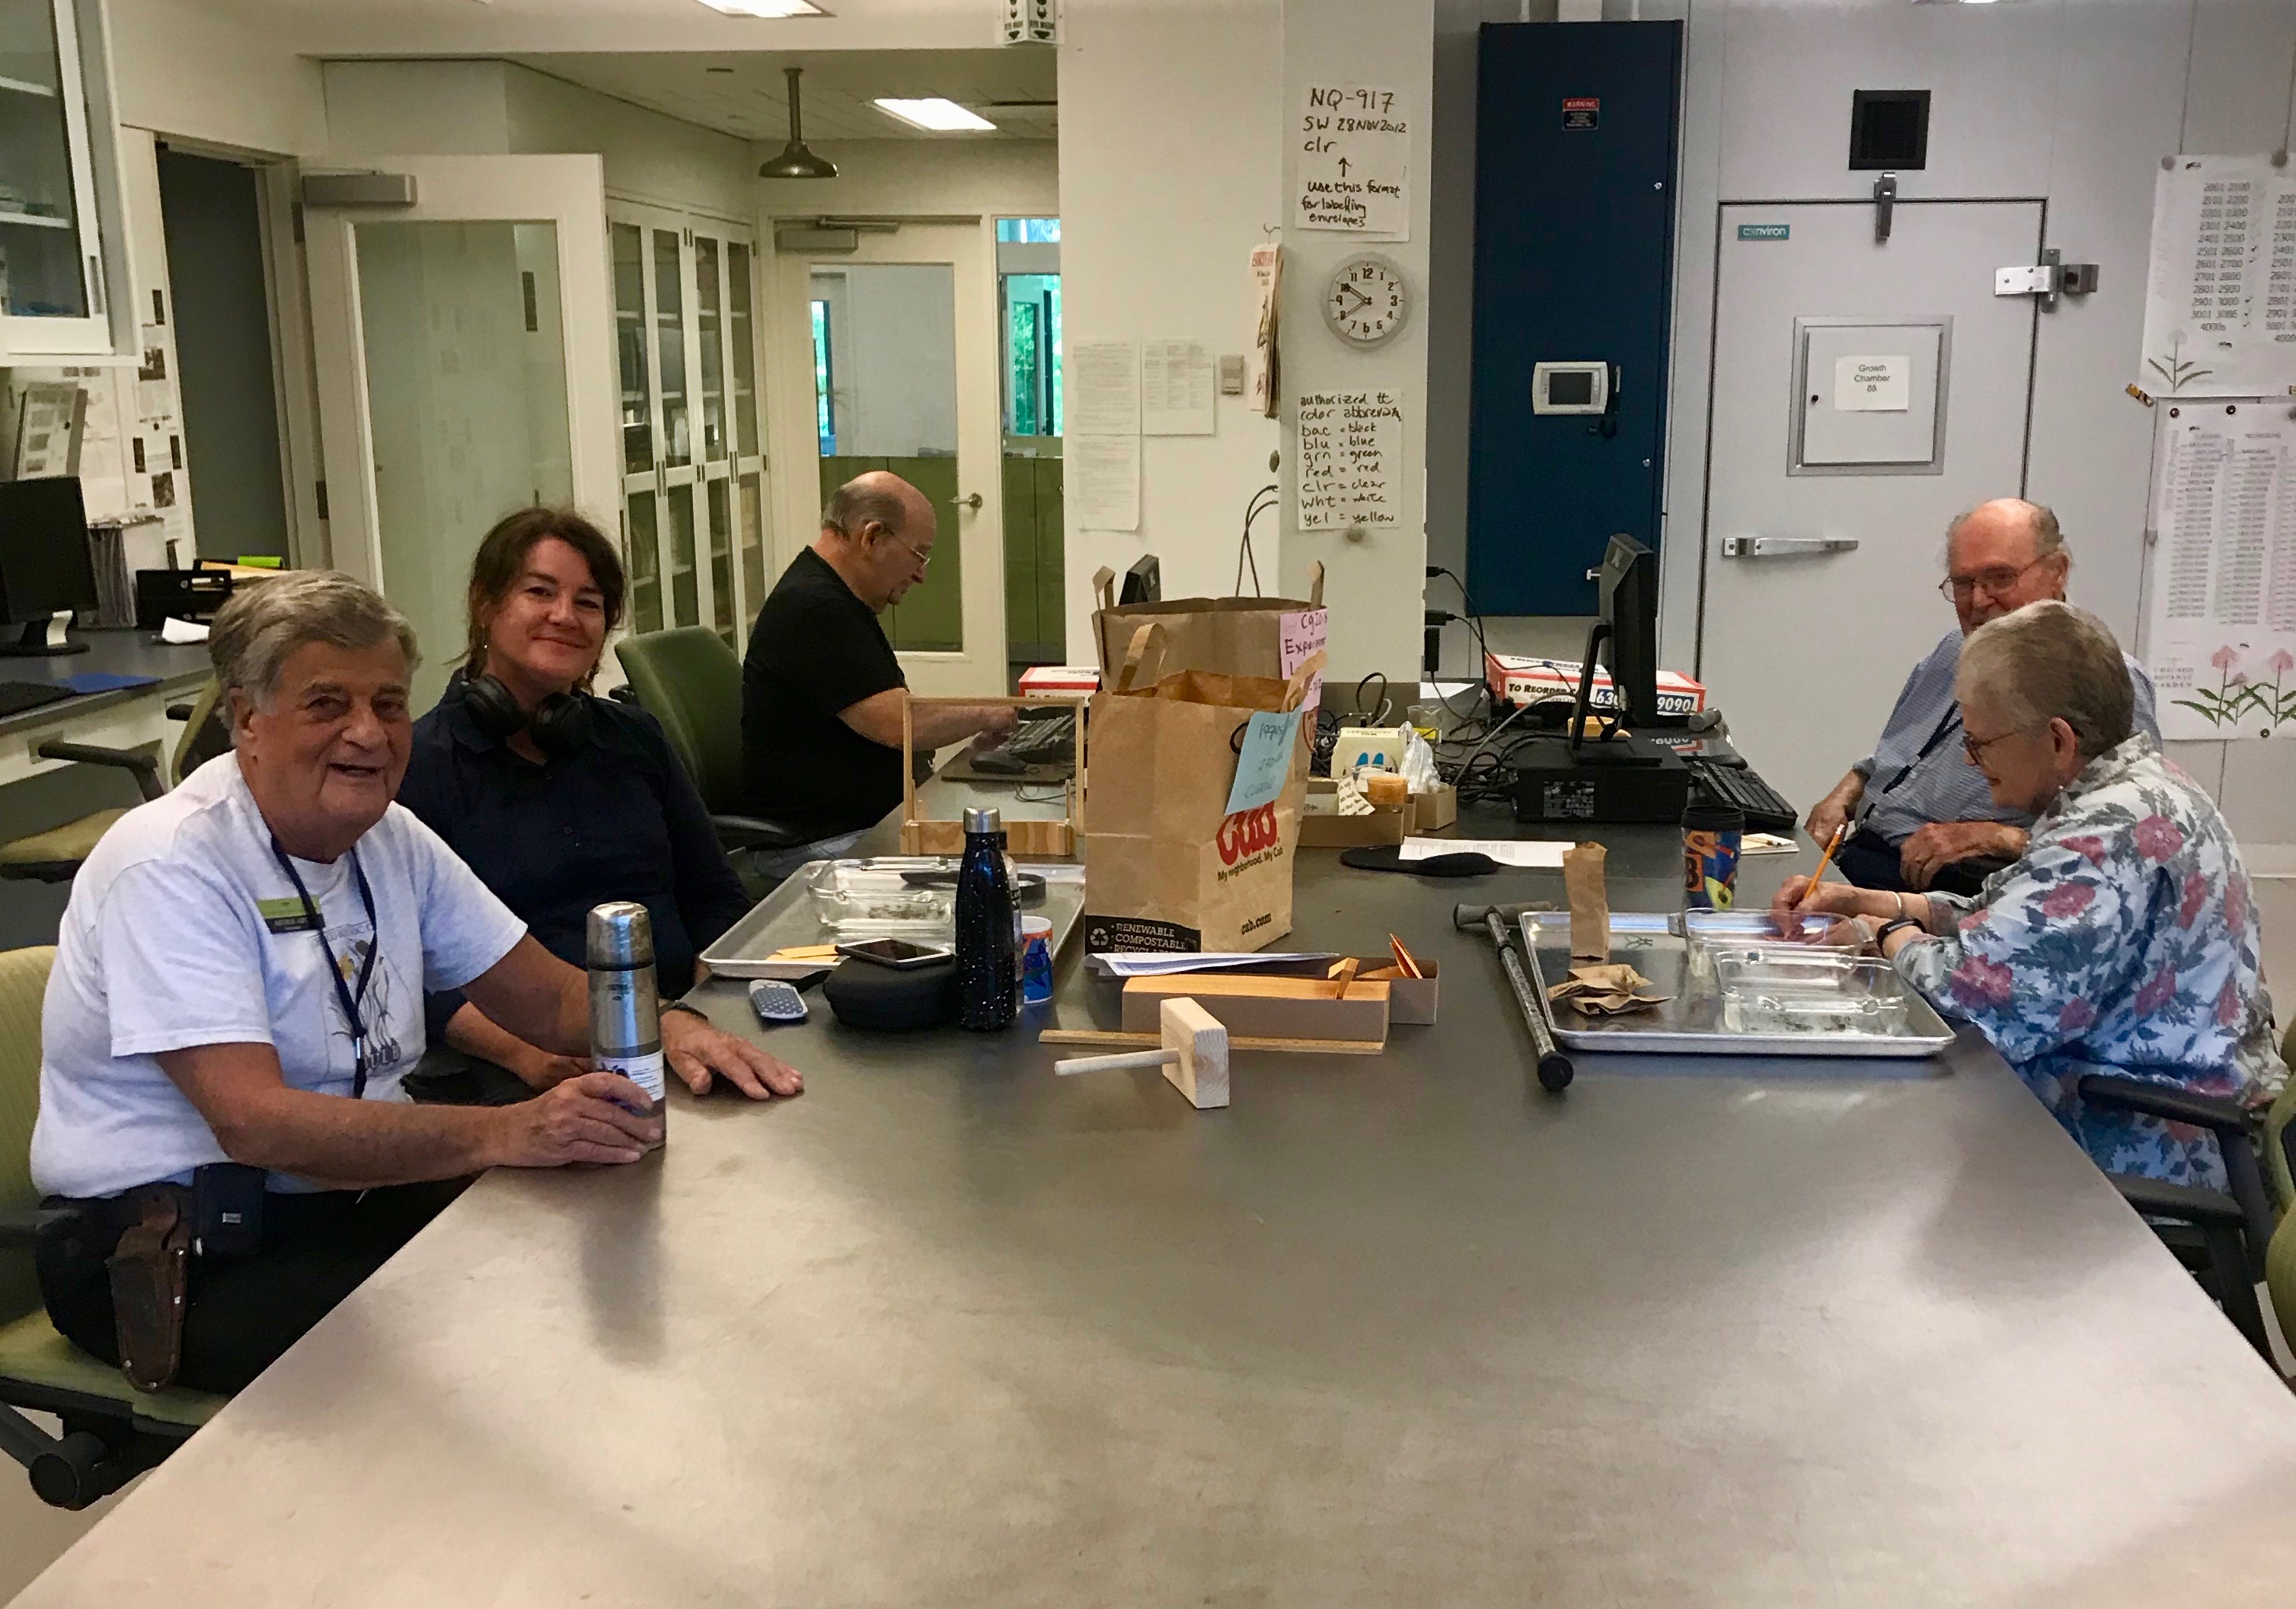
Mia, Marty, Allen, and Stuart hard at work in the lab
On Monday, we welcomed back our second volunteer of the season, Marty. Marty is an expert on the scanner and x-ray, but since the new x-ray machine hasn’t arrived yet, she and Allen have been our rockstar head cleaners. So far, it has taken 22 person hours to clean 85 echinacea heads. Based on these numbers, it will take an additional 56 hours to finish cleaning the 216 remaining heads in the 2020 burn rem batch that we’re currently working on. If the volunteers continue to work at this rate, cleaning this batch would be completed by next Tuesday, October 26. In preparation for future head cleaning, we emptied out the seed dryer and refilled it with gbags from the 2021 harvest.
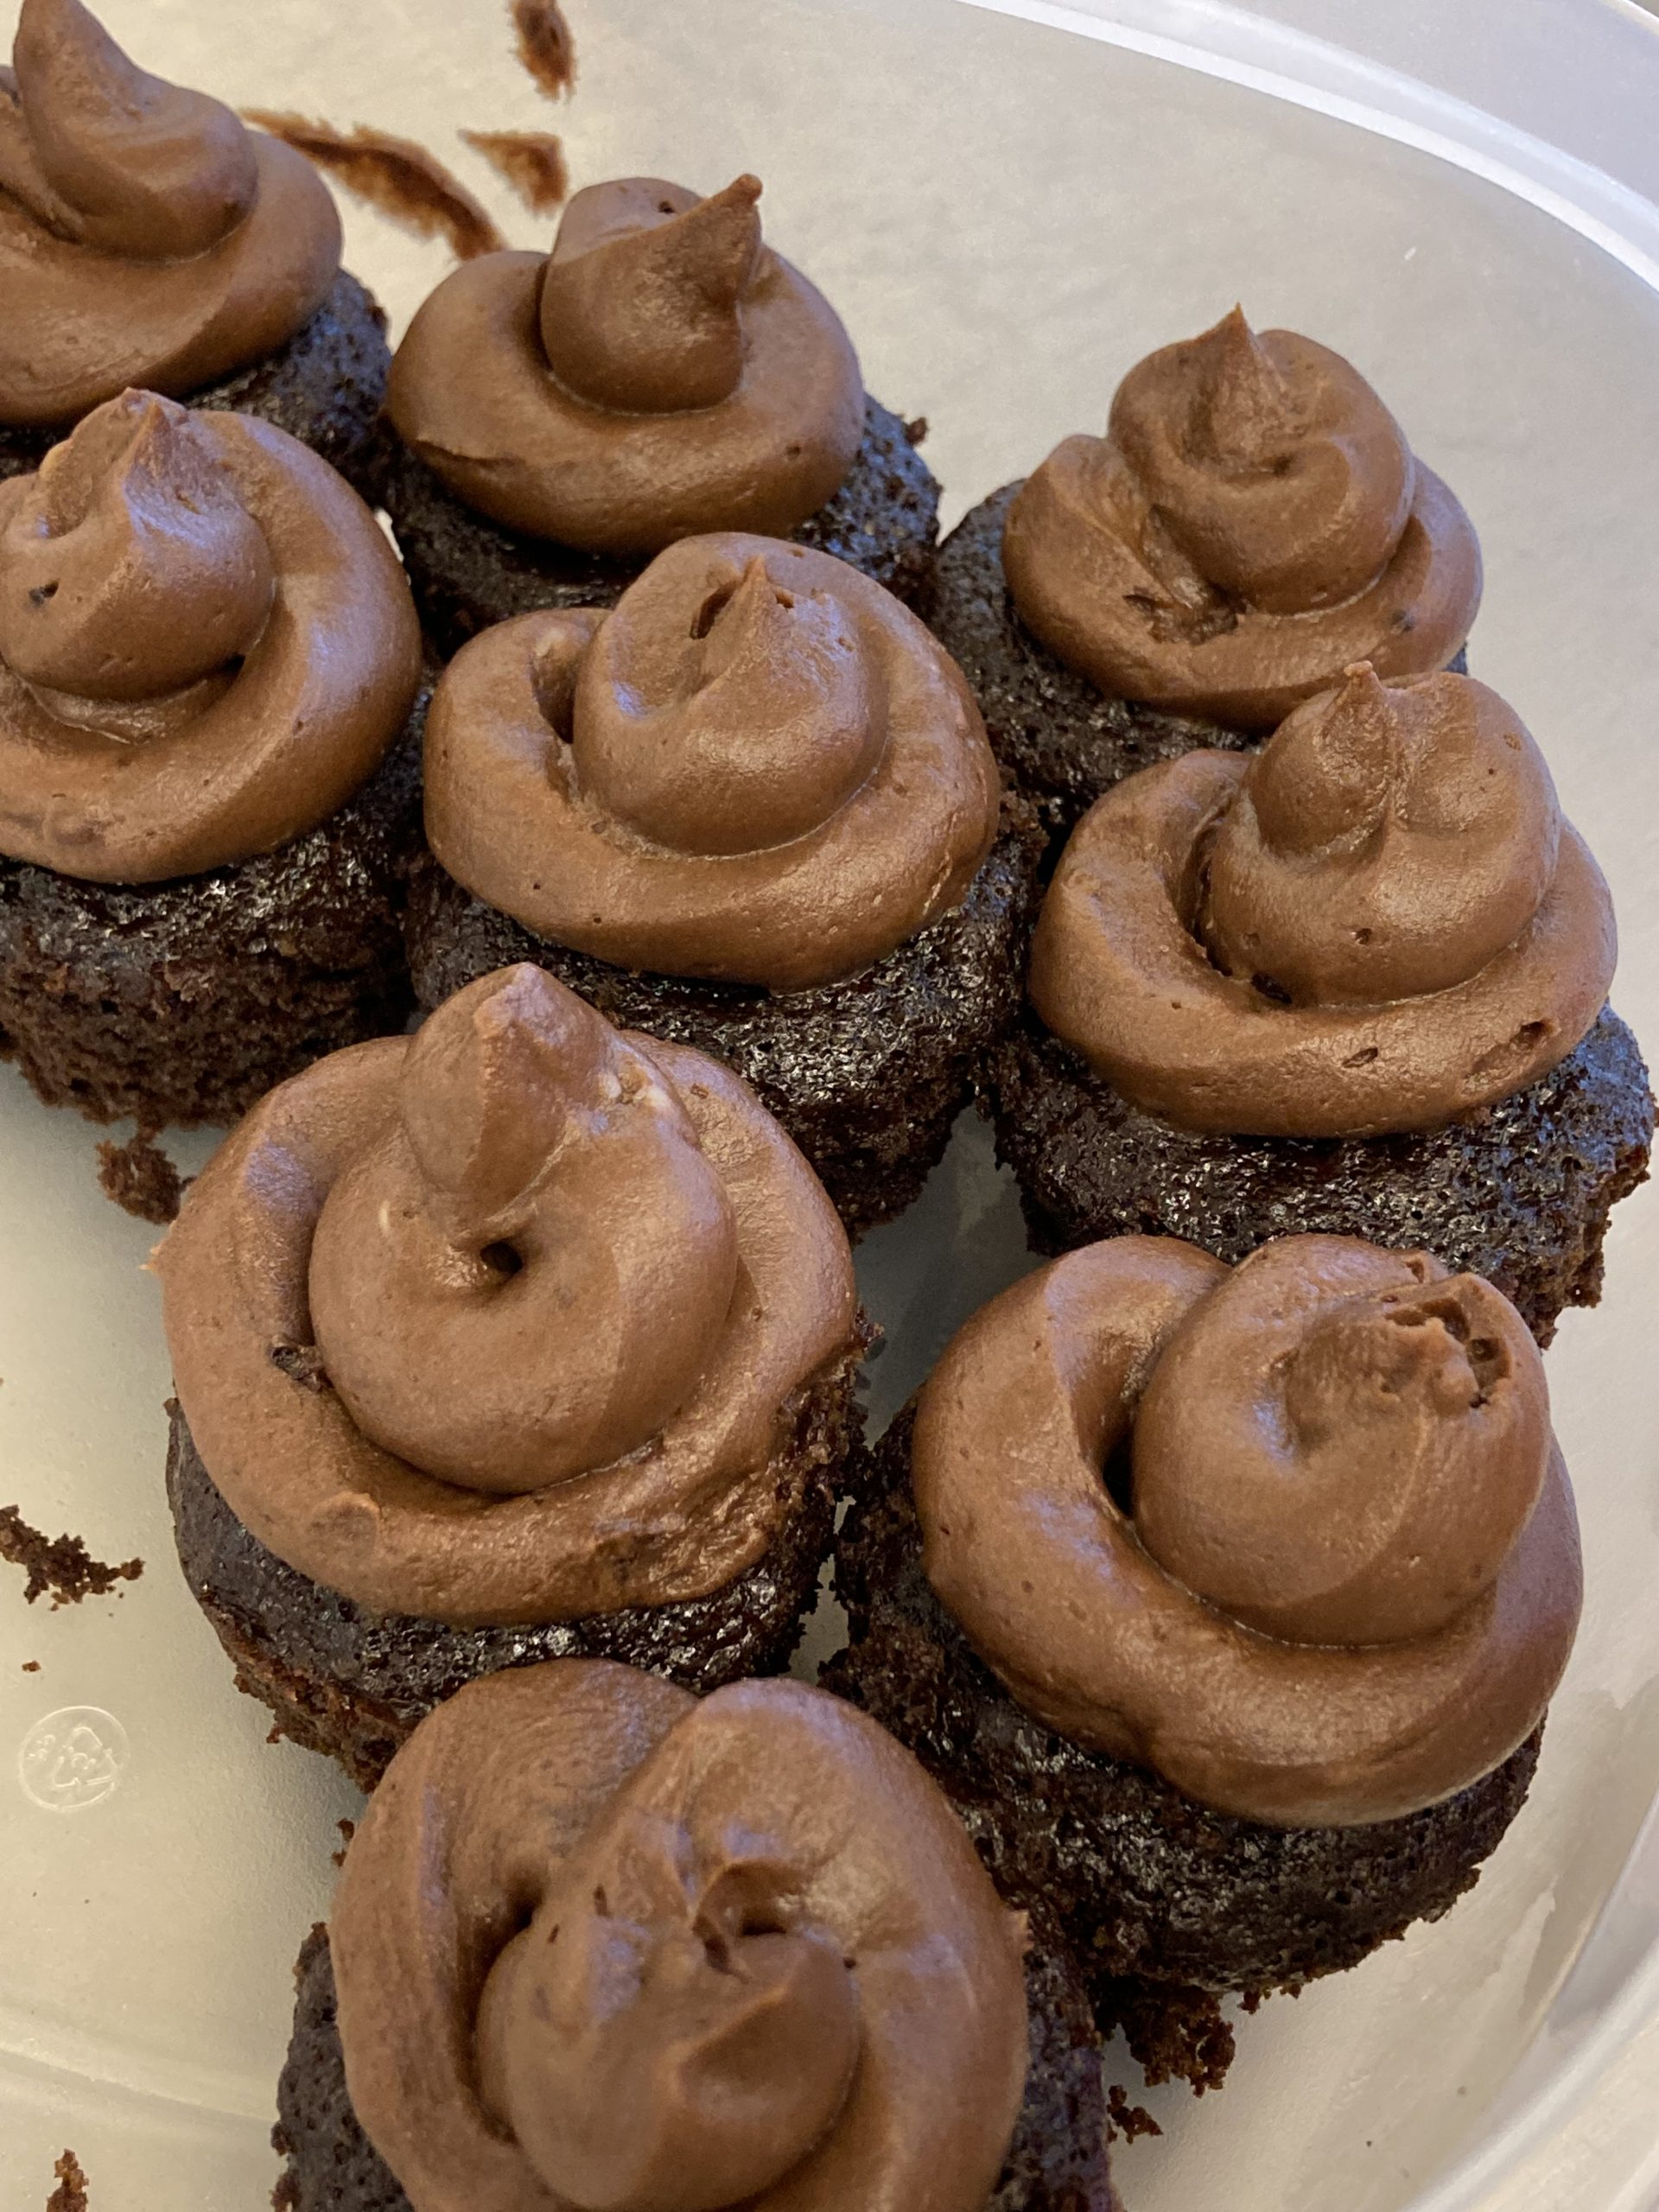
To celebrate several birthdays this month, Mia baked cupcakes for us! They were very chocolatey and delicious. We even made some new friends in the Plant Conservation Science Building by offering them cupcakes.
Tate is interning with us in November with his classmates from Lake Forest College. We’re excited to have his help around lab!
Tate, happy to see a scan with barely any chaff! Nice work, cleaners!
Hi FLOG!
I’m Tate Rosenhagen, a junior biology major at Lake Forest College doing a four week mini internship at the Chicago Botanical Garden for a Plant Biology course. It’s my second week in the Echinacea lab, coming in once a week for four hours, and this week I’m learning how to count achenes and randomize samples! Last week I learned a lot of the background of the Echinacea project; what an achene is, how to remove the achenes from the flower head, and a little bit about Echinacea and their pollinators. One of the questions I hope to answer while I’m here is if there is a relationship between seed number and average seed weight in Echinacea. I hypothesized that in heads with fewer seeds, the average seed weight should be higher as all of the plants are in the same experimental plot and thus are subject to the same conditions and nutrients. If the plants have roughly the same amount of nutrients and conditions, theoretically plants should use the same amount of energy as their neighbors. Therefore, I hypothesized that if one plant has created fewer achenes than another plant, their achenes may have more nutrients in their endosperm thus leading to a higher weight. However, a number of factors could cause plants to use their energy in places other than their seeds, such as damage repair on the plant itself or stem growth. I hope that some of the data I find while I’m here will begin to answer this question, however, only being here once a week for four weeks limits how much data I am able to collect.
Since Stuart and Team Echinacea have started summer field work in Minnesota, you might guess the lab at CBG slowed down- but you would be wrong! Last week we finished cleaning another bag of Echinacea heads, and this week we’ve gone through over half of the next bag! People counting achenes and classifying x-rays have also been super productive, and some of the newer volunteers finally got their official CBG badges. So even though there’s a lot going on in Minnesota, we’re still busy back in Chicago. Stay tuned for more lab updates throughout the summer.
From right to left, Char is cleaning, Aldo and Alan are counting, Tessa is cleaning, and Art is chatting because he was actually working outside this morning!
For those of you who read all of my flog posts (I know there’s a solid number of you out there!) you’ve probably figured out by now that I love posting about numbers. So what’s today’s number?
Why, it’s 1948 of course!
Now this is the point that you might furtively look at wikipedia and say “I don’t understand what 1948 has to do with Echinacea. Everyone already knows that 1948 was a leap year starting on Thursday of the Gregorian calendar, the 1948th year of the Common Era (CE) and Anno Domini (AD) designations, the 948th year of the 2nd millennium, the 48th year of the 20th century, and the 9th year of the 1940s decade.” To which I would say that we are dealing with the number 1948, not the year.
No, 1948 is the number of seed packets of echinacea we x-rayed at the garden this week: and it’s only Wednesday! Through the combined efforts of many volunteers we are making some headway into the daunting task of figuring out which achenes have seeds in them and which do not. Look for updates soon about these number for our pollen limitation heads!
Michael
p.s., here’s a small sampler of what the xrays look like
A look at our qGen_a xrays from 2013. There’s almost 900 images total in this folder (not nearly that many are shown here)
Counting the total number of achenes provides important information regarding seed set to access the female fitness.
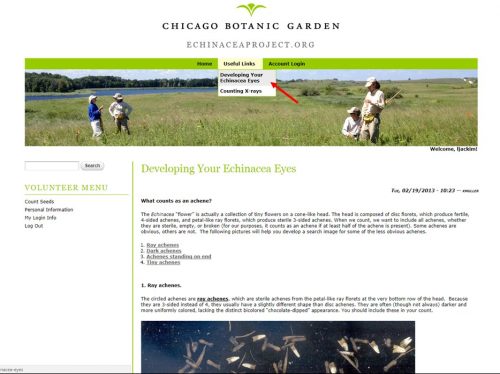
Before you start to count achenes you may want to get adjusted to looking at them. Under the tab “Useful Links” on the echinaceaproject.org/lab page you will find “Developing Your Echinacea Eyes” click on it to get familiar with the different types of achenes you may see. Achenes range from rays to tiny achenes so it’s important to make sure you know what to count( Figure 1).
Figure 1. Familiarize yourself with what different achenes look like
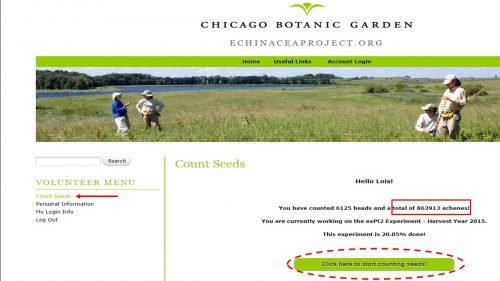
The “counters” (people who count achenes) use the scanned image of the achenes to count how many achenes come from a single head. This is done by logging on to the echinaceaproject.org/lab website to access the page to count seeds; a detailed protocol is available in lab. All volunteers and staff will need a username and password for this website to be set up in advance. Once logged on to the website, click the link under the side Menu entitled “Count Seeds” (Figure 2).
Figure 2. Lois (the Achene Queen) has counted 862,912 achenes and counting…
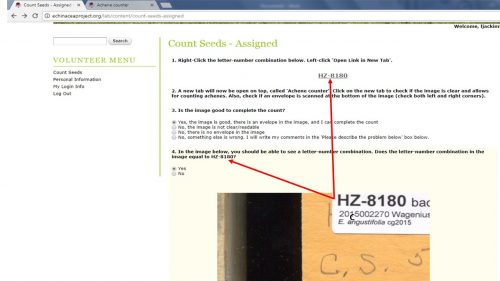
This will then lead you to another screen where you will have information on the progress of the project you are working on as well as the number of seeds you have counted. The example shows our Achene Queen Lois’ stats, she has counted well over 800,000 achenes! Start counting seeds by clicking on the green button aptly titled “Click here to start counting seeds!” (Figure 2). The next page will provide you with a set of questions to answer regarding the head from which you will count seeds. The letno (Letter/Number combination) of the head will be provided and you should open the image in a separate tab. Once you see the image is of good quality you will be shown the envelope that should have the same letno combination (Figure 3).
Figure 3. Make sure you are counting achenes from the correct Echinacea head!
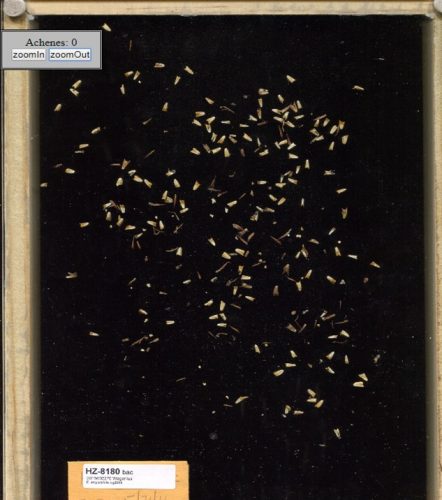
At times there is nothing in the image in question four but if the envelope in the scan you opened matches the letno the question asks about then you should mark “yes” they do match (Figure 4).
Figure 4. Full image of achenes with the envelope and LetNo in lower left corner
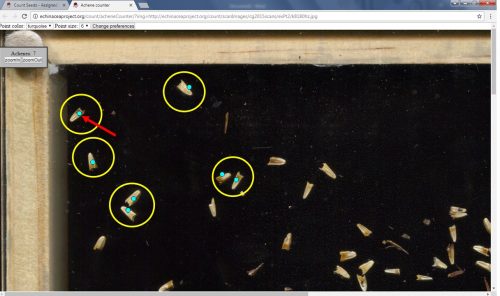
In the tab with the scanned image you will see a floating counter. When you click on an achene you will see a cyan dot appear and the number of dots, i.e. achenes, will be recorded (Figure 5). You can get rid of dots by double clicking on them and the counter will adjust to a new total.
Figure 5. Circled achenes that have been counted. Red arrow points to a cyan dot that the floating counter in upper left corner tracks.
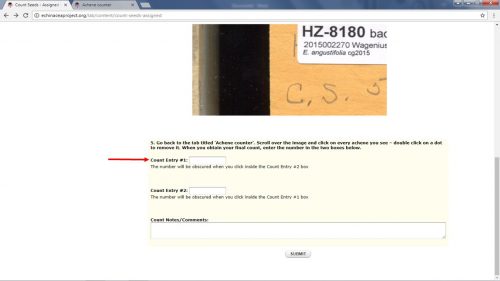
Once you have counted all the achenes the total should be recorded in question five (Figure 6). Once you are done with that head you can submit the information and you will be asked if you want to count another head.
Figure 6. Return to the other tab and fill in the count information
Now you can start counting like the Achene Queen Lois!
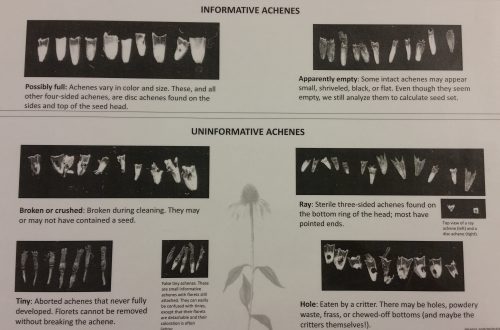
The next step of the ACE protocol is to take a random sample of all the achenes which will then be x-rayed for seed set and viability. The randomness of the sampling is important to not introduce any potential biases in which achenes are chosen. If only potentially fertilized achenes were chosen then this would lead to bias in the data; thence, inaccuracy in assessing the experiments from which they came. The sampling of all the achenes will then be separated into informative and uninformative categories. The informative achenes will be x-rayed since they will be able to inform whether or not there is a viable embryo inside the achene. The uninformatives are those that have been damaged, eaten by a critter, or “tinies”/ “micros” that were never fertilized. There is a reference image to help determine whether achenes are informative or not (see image below).
General guide of how to identify the differences between informative and uninformative achenes
Detailed instructions of how to take a random sampling is in the protocols folder. The envelopes, segmented circle and achene counter paper is located in the cabinet to the right of the center area close to the windows.
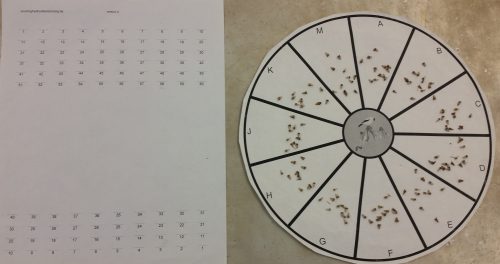
The achenes to be used are in the box that has “scanned behind this card” present. The informative achenes get placed in the clear plastic baggies located in the drawer labelled “plastic baggies” make sure to use the “Good Ones” in the drawer. The uninformative achenes get placed in a small white envelope. Both get a label that corresponds to the original manila envelope from which it came. Spread the achenes evenly around a circle. Randomly select two segments to separate into informative and uninformative. These two segments account for about 1/6th of the total achenes. Record the number of informative and uninformative achenes from that envelope on a sheet (see image below). Once achenes from the manila envelope are sampled both the manila achene and chaff envelopes are placed behind a marker “randomized behind this card.”
Once the achenes are evenly distributed on the circle two segments are randomly selected and separated into informative and uninformative achenes
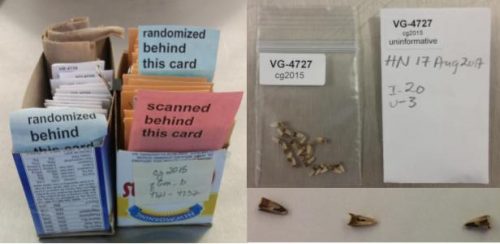
It can also be helpful to write this number on the white envelope. The white envelope and clear baggie containing 1/6th of the achenes are placed in another box. After this point the informative achenes will be x-rayed.
The next post will focus on what happens after the achenes have been scanned: COUNTING!
The scanned image of all the individual achenes will be used to count the number of achenes for that one head . This process allows for increased accuracy in assessing female fitness by allowing for a precise count of total achenes per head.
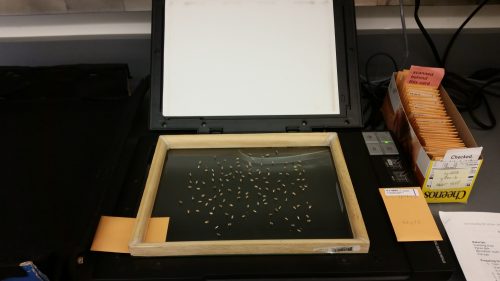
There is a document for the protocol of each step of scanning in addition to particular settings for the scanning software (please refer to that document for details). The document can be found in the “Protocols” folder in the lab by the light switch. First, the achenes are spread on a glass frame which is stored in the cabinet labeled “Trays for Scanning.” Spread the contents of the envelope onto the frame making sure that there are no achenes along the edge. Important to this process is that there are no overlapping achenes and that none are standing on end. Next, the envelope with the achene information should be placed at the bottom left of the glass (see image below). This whole setup is covered with a lid of a box top cover in black fabric NOT the cover that comes with the scanner.
The basic setup of scanning achenes.
Double click the “VueScan” icon on the desktop to open. Make sure the settings correspond to those that are in the protocol that can be found in “Protocols” folder in the lab (once the setting is made a first time it remains but it is still a good idea to double check). The scans should be stored in a “Default Folder” on the computer; the name of the folder changes each year. The 2015 scans will be stored on the C drive in the folder entitled cg2015scans. This folder will change with the collection year. Each scan is named according to the letno on the envelope.
Once the achenes are scanned they get placed back in the envelope and any chaff or dust that may be left is put in the chaff envelope. The scanned achene envelope is then moved to the back of the box behind the marker “Scanned behind this paper.” After a box is done being scanned the envelopes of achenes and chaff move to the next step of random sampling.
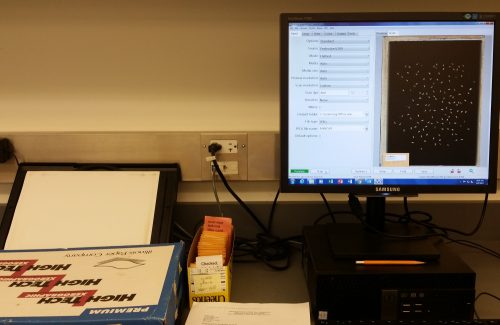
Scanned image as seen in VueScan software. Note that a box lid is used to cover the scanner bed not the original cover.
Once the initial cleaning of Echinacea heads has been completed the next step in the ACE workflow is (re)checking.
Checking is an important step to get a precise count of achenes per head to accurately measure plant fitness. The bags with the cleaned head, achenes, and chaff are checked to ensure that there are no achenes in the chaff or left on the head. Once the envelopes have been thoroughly checked they are labelled according to experiment. Both envelopes are then organized numerically in a box where the next step is to be scanned.
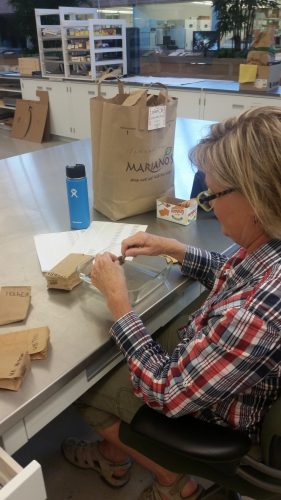
Kathryn checking Echinacea heads and chaff for stray achenes
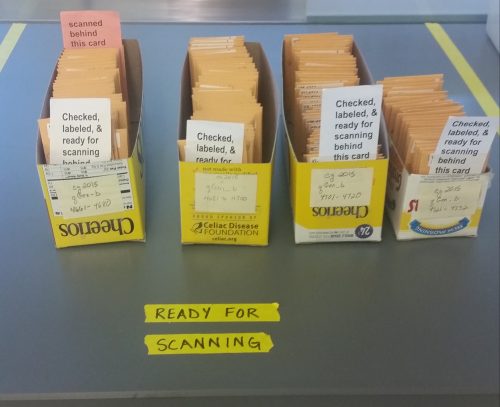
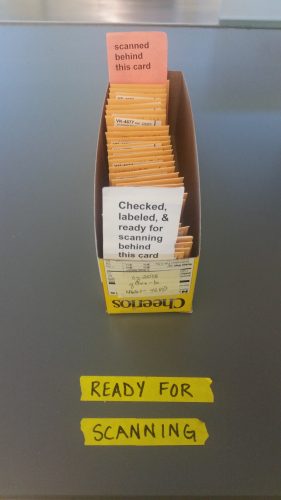
After this point paper markers are used to identify where in the ACE process the envelopes are. Once checking is complete a paper marker that reads “Checked, labeled, & ready for scanning behind this card” is placed in the box. As volunteers work through the process the paper markers are moved to the appropriate positions (see images below).The next stop on the achenes’ trip is to the scanner to accurately count everything (all the achenes) from the image.
Boxes of achenes and corresponding chaff envelopes in sequential order in the “Ready to be Scanned” area.
Box with markers indicating it has been not only checked but also some achenes have been scanned.
Once the flower heads are harvested for each of the experiments the achenes (seeds) need to be separated from the rest of the head (chaff). The achenes are the important part as they will inform the results of the experiments. All volunteers and staff are blind to which experiment is which so that there will be no bias as to how many achenes “should” be present for each experiment. The process of cleaning heads can be involved and each person has their own technique.
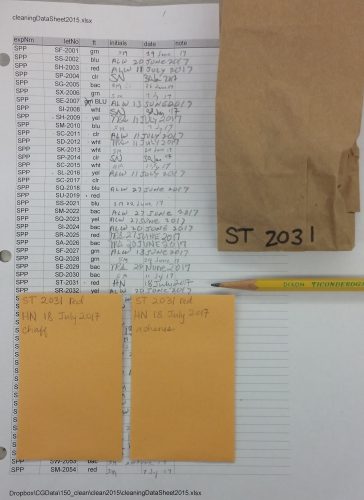
The first step is to label two envelopes: one for the achenes and the other for chaff. The label should have the number of the experiment with the twist tie color, your initials with the date, and then chaff or achene. There is a separate datasheet that has each head detailed where you should cross reference the information and initial with the date. (see below for example).
Example of how to label an envelope and cross check the datasheet where you can write notes such as if a twist tie is missing or a different color
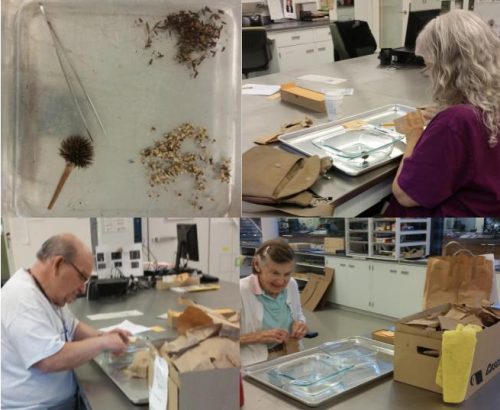
While cleaning it is important not to damage any achenes in the process (though this will happen). People use a variety of tools and techniques to clean a head from toothpicks to tweezers. The stem may be prickly so if you are like me you may need use a napkin or gloves to protect your fingers. There may be achenes that were damaged by critters that took a bite but these should still be placed in the “Achene” envelope. The achenes at the bottom of the flower head are called ray achenes and should also be included in the achene envelope. These can be “hidden” and hard to clean so be patient and thorough. Achenes may be have florets attached which can be left on. Separate the achenes and chaff (a strainer/sieve can be of great help) and place them into the appropriate envelope. Once a head is cleaned put it back in the original little brown bag with the twist tie as well as the two envelopes. These finished bags are but into a big box. Once all the heads from one experiment are cleaned the box moves on to the checking process to ensure there are no stray achenes in the chaff or head. “Check” out the next post for more details….
Clockwise: Cleaned head with achenes and chaff separated; Some of our star cleaners Naomi; Susie; Alan. Note in the above photos the little brown bag with a head is taken from the large brown bag and when cleaned placed in the cardboard box.
P.S. Today Susie cleaned the last head collected from 2015! She already started on the 2016 experiments : )