Hello Project Echinacea Flog!,
My name is Sebastian Di Clemente I am the Lake Forest College 2012 spring intern class of 2013, and I am quite excited about, this, my first post. I’ve been assigned the project of determining the best settings and magnifications for the new x-ray machine. Below you will find my report about the various magnification levels.
X-ray machine magnification
27 February 2012
Sebastian Di Clemente
Introduction:
The population biology lab is trying to determine the best x-ray magnification to use for scanning Echinacea achenes. The criteria that constitute “best” are image quality and contrast, label legibility, and overall time and efficiency. Each magnification presents different advantages and disadvantages, some more prominent than others. The use of these x-rays can give a more definitive answer of whether an achene has been fertilized compared to achene weight. With this experiment I will evaluate the x-ray machine magnification levels and determine the best choices and ideally isolate one magnification setting that would be best.
Objectives:
1. Obtain the best contrast quality possible for achenes
2. Obtain the best quality setting to read the label on the envelope
3. To determine the best settings and magnifications to use to maximize both label legibility and achene contrast
Methods:
I scanned batches of Echinacea achenes in envelopes under the 10 second and 18 kv setting on the x-ray machine at the varying magnifications (magnifications are 1:1; 1:1.5; 1:2; 1:3; 1:4; 1:5) and window level settings. After taking a number of images at each magnification and assigning the prescribed window level settings (see X-Ray Machine Protocol for Echinacea) I compared images side by side. I then documented similarities and differences, and pros and cons of each image on their own and in relation to the other images taken. Based on the resulting images and my notes, I determined what each magnification might be useful for. Finally, I choose two magnifications out of the six that I thought would be most useful, and then weighed the pros and cons of each one more heavily and made my final choice as to which magnification would probably be best.
Results:
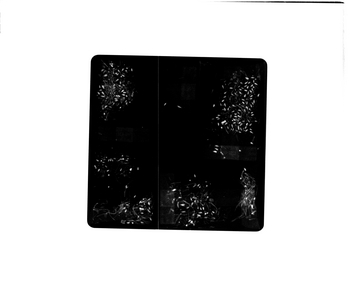
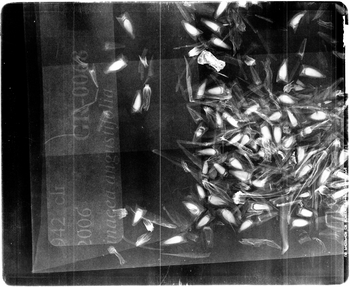
1:1 Magnification

At the 1:1 magnification the labels are hardly visible. The zooming in on this image would not do that much good because the image will become more pixilated. It is quite difficult to distinguish the achenes that are hollow and have not been germinated. Also, it is not possible to tell where the envelopes end or begin. The only real benefits of this setting are that four envelops can be scanned at a time and the achenes that have an embryo can be fairly easily counted.
1:1.5 Magnification
A magnification of 1:1.5 clearly does not show the greatest image. Although three envelopes can be captured in the image the labels are rather difficult to read and part of the third envelope gets cut off. The orientation of the envelopes is also a bit confusing and more laborious to set up. Positives of the image are that a large sample of achenes can be processed at a time. Another benefit is that after zooming in on the picture the achenes are easy to count and the visibility of germinated and non germinated achenes is fairly clear.
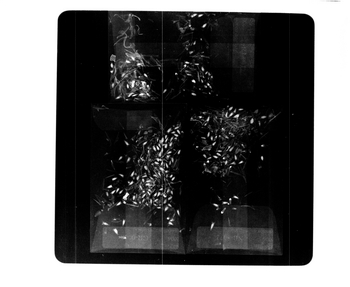
1:2 Magnification

The first benefit the 1:2 magnification has is that two envelopes can be scanned at a time. This benefit can double the speed of the scanning process. The extra space around the two envelopes can be use to include any smaller envelopes that may come inside the main envelope. The labels in this setting are still readable and the achenes show up nicely. The image needs to be zoomed in upon to provide a more accurate count of the achenes and to tell which have been germinated and which have not. If time is not of the essence, one of the magnification settings soon to follow would be recommended.
1:3 Magnification
The magnification setting of 1:3 is a good compromise between the previous settings and the settings to soon be discussed. This setting provides an image that encompasses a full envelope and leaves some room to spare. The extra room can be used for adding any small envelopes used to set aside certain achenes that may come inside the main envelope. The label in this image is fairly legible and every achene can be counted. It is also possible to determine which achenes have an embryo or are lacking an embryo. Furthermore, if the image is zoomed in upon it is possible to see any damage or defects of the achenes. The only issue with this magnification setting is that only one envelope can be scanned at a time, which makes the overall scanning process proceed at a slower tempo.
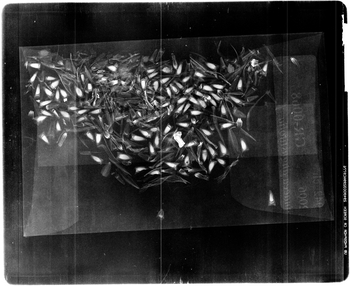
1:4 Magnification
A 1:4 magnification setting provides a fine image that shows both the label and the achenes clearly. From this magnification it is easy to count achenes, see any damage or defects of achenes, and tell whether achenes are hollow or have an embryo. Drawbacks to this setting are that the entirety of the envelope is not captured in the image, which leaves achenes not visible at the bottom or top of envelop that is cut off. Another obvious set back is that it is only possible to view one envelope at a time. This setting would be recommended to use if a close examination of the achenes is need, especially when trying to examine a greater number of achenes at a time.
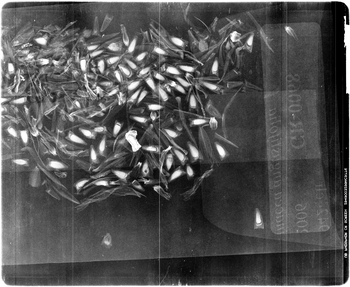
1:5 Magnification
At a 1:5 magnification the clearest results are returned. Each achene can easily be counted, identified as hollow or full, and the label is clearly legible. This magnification is the highest magnification possible on this x-ray machine and is therefore the high-end extreme. The negative aspects of this magnification are that it is not possible to capture the entire envelope in the image. Unless all of the achenes are pushed towards the label there is no way of telling how many achenes may not be accounted for. As a result of not being able to fit one full envelop in the image it is not a far stretch of the mind to understand that capturing two envelopes at this magnification setting is out of the question and that only one envelope (or part of one). At this magnification, it would only be recommend to be used to examine certain achenes in order to inspect damage, shape, or any other anomaly that is being investigated.
Conclusion:
Considering all of the magnification settings, the top two would have to be 1:2 and 1:3. These levels have the most benefits out of all of the other settings without all of the negatives of the other settings. These two options are thus recommend for use. The question that presents itself is a matter of time and efficiency, and what setting is best to use. At the 1:2 setting, does the time saved by scanning two envelopes at a time out weigh the time it would take a person to zoom in on each envelope and count the achenes and determine which are germinated and which are not? At a 1:3 magnification, does the time to scan one envelope at a time and continually switch out samples negate the time it takes for a person to count the germinated and not germinated seeds without zooming in?
After carefully considering the question of time and efficiency I conclude that the 1:2 magnification setting is indeed the best choice and the 1:3 setting the second best choice. The time it takes zoom in on one envelope to count the achenes and determine their germination states and then zoom out and zoom in to do the process over is shorter that the time it takes to scan one envelope at a time and be easily to count the achenes and determine the germination states without needing to zoom in. To zoom in and out and back in takes far less time than completely going through the image scanning process for individual envelopes. The time it takes for the media plate to go through the CR reader is what takes the longest and makes the 1:3 magnification the second best choice.
All accounted for, the best magnification setting to use is 1:2 for time and efficiency sake. If time is not of the essence, then the 1:3 magnification setting would be the best option. The final ranking of all of the magnification settings would be: A.) 1:2 B.) 1:3 C.) 1:4 D.) 1:5 E.) 1:1.5 and F.) 1:1 respectively. This ranking and the best option may very based on the experiment being run, sample size, and what the object of inquiry is. For a general scanning to most efficiently count and determine germination states this ranking holds. If a different experiment is being conducted and or a different sample size or object of inquiry is at hand then the best setting to use should be determined as needed based on the pros and cons as listed in the previous pages.