Below is the classification protocol for Liatris X-rays
|
||||
|
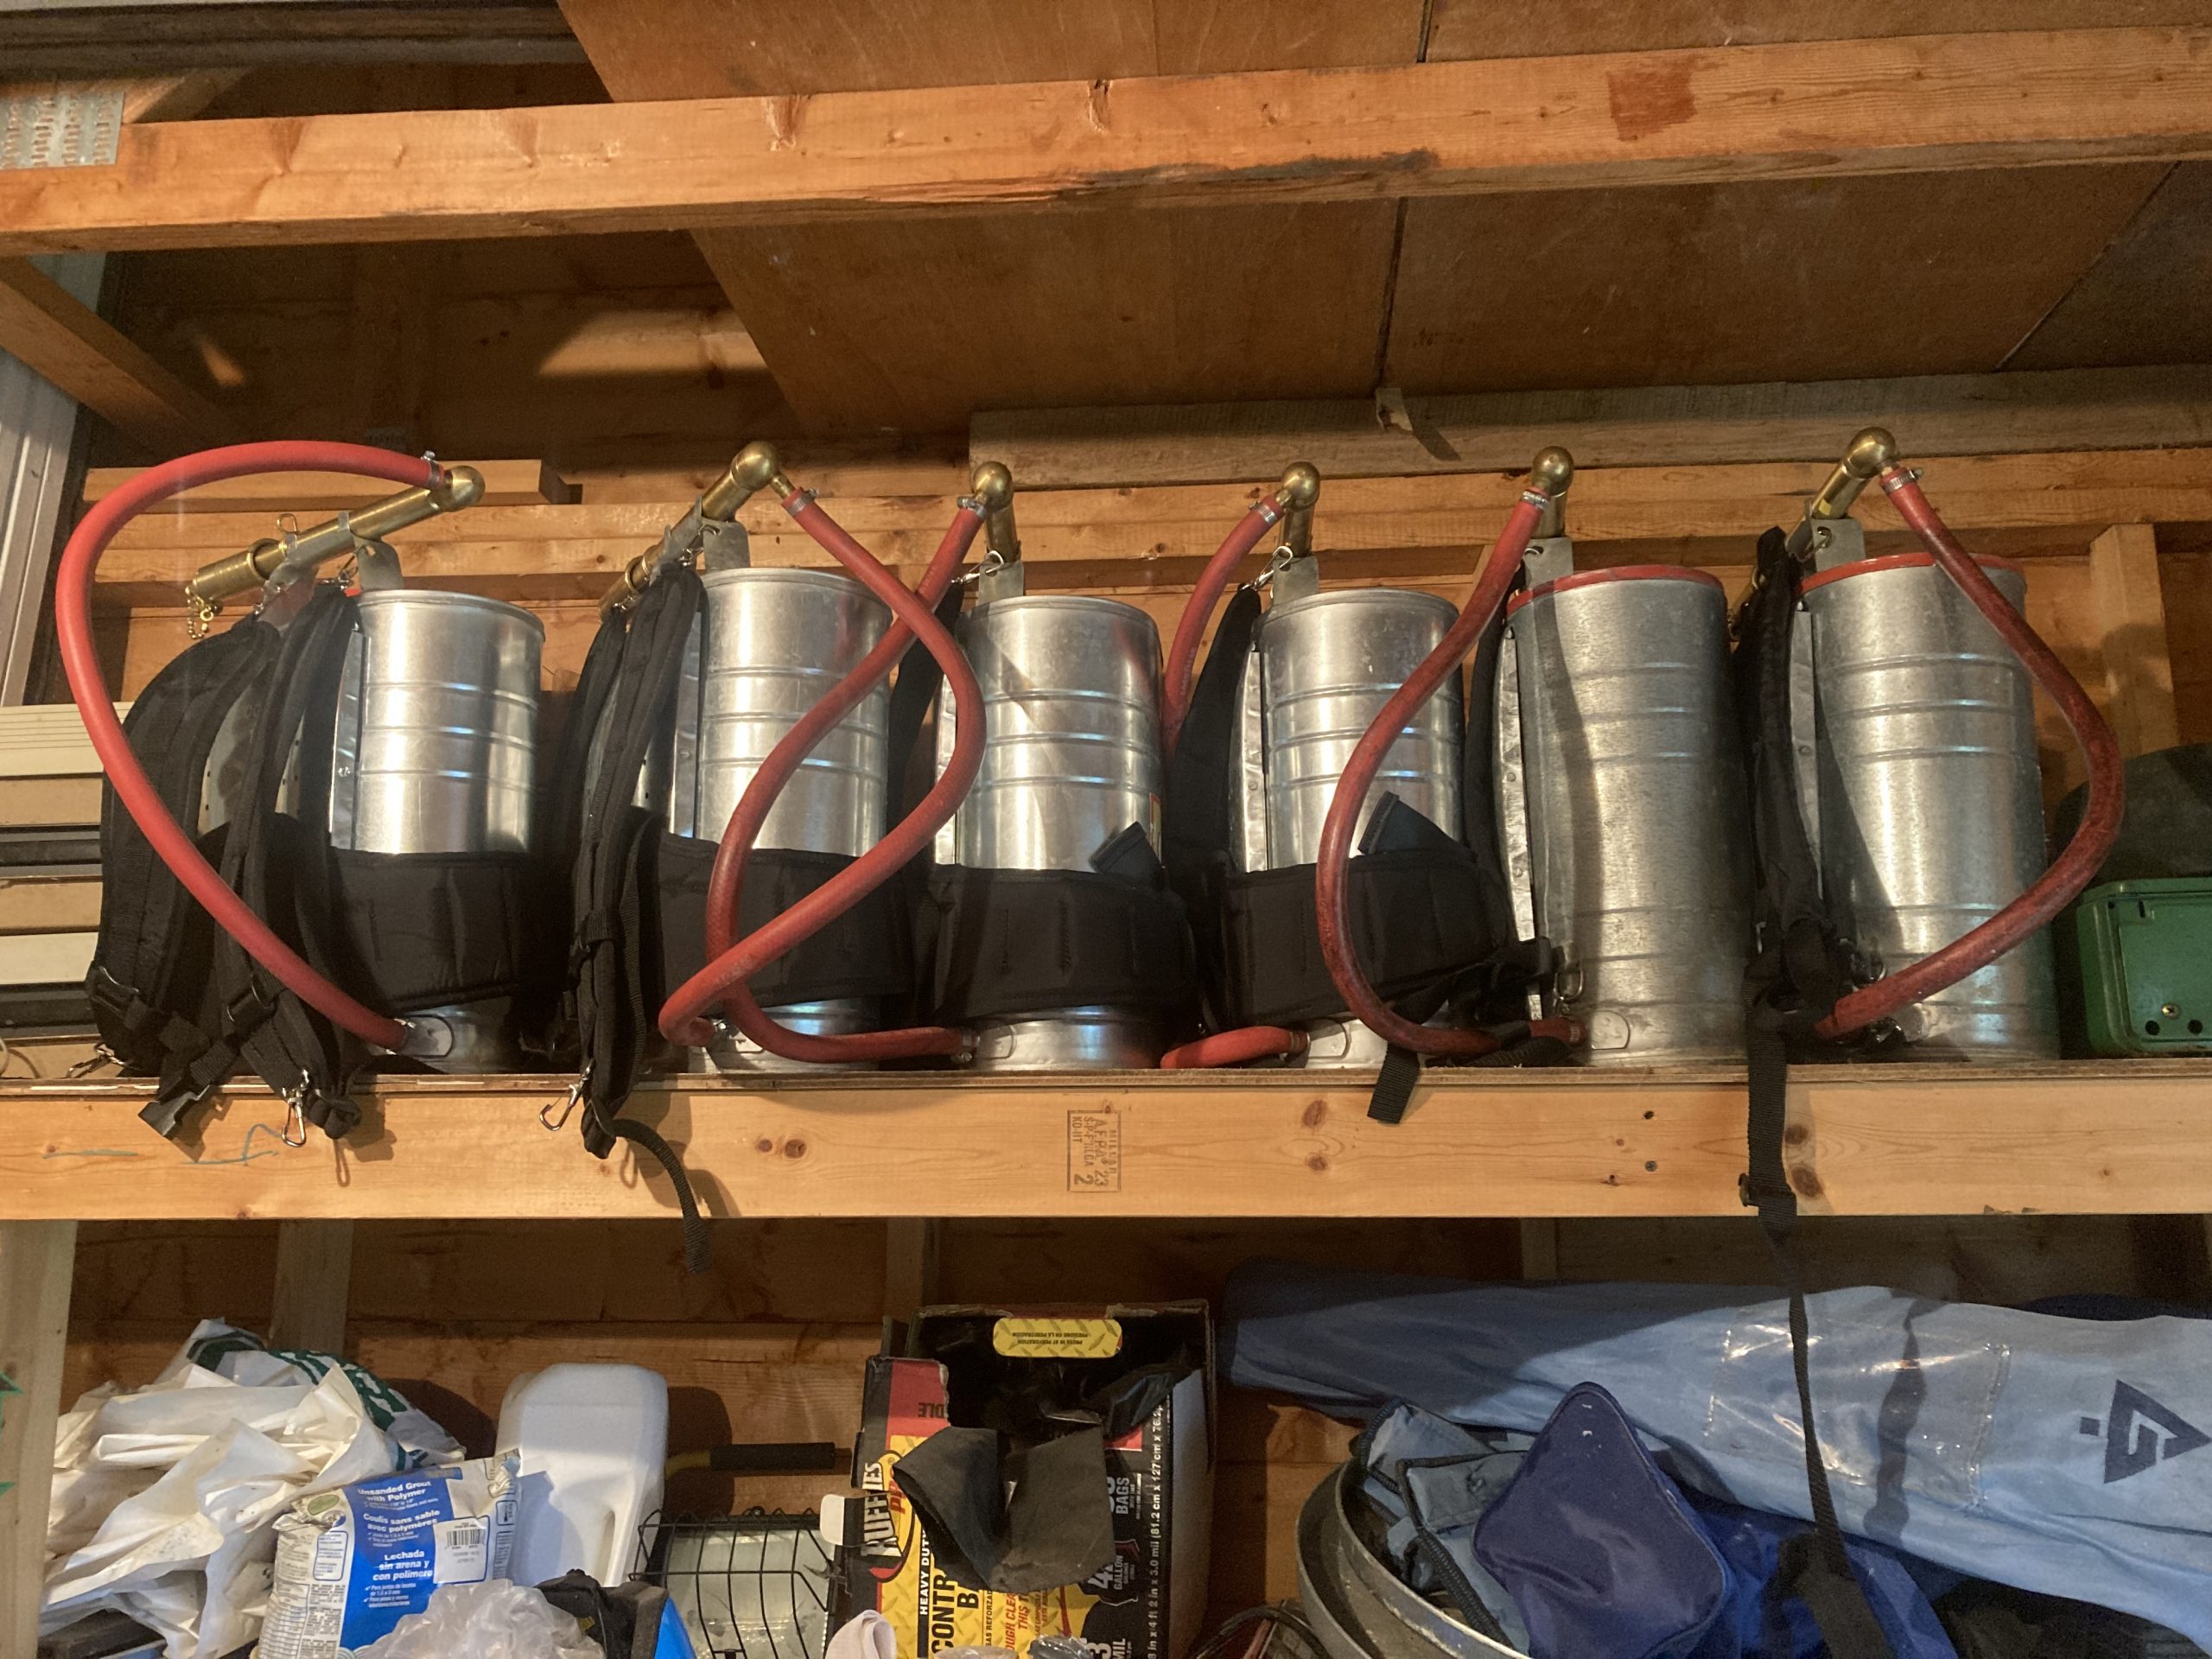
With a busy burn season ahead of us, I took some time in late October to maintain the equipment we use for prescribed burns. During a hectic spring 2021 burn season, we encountered several issues. A handful of 5-gallon backpack pumps were not functioning well and one of our drip torches was constantly acting up (especially while using the leftover “spicy” fuel mix).
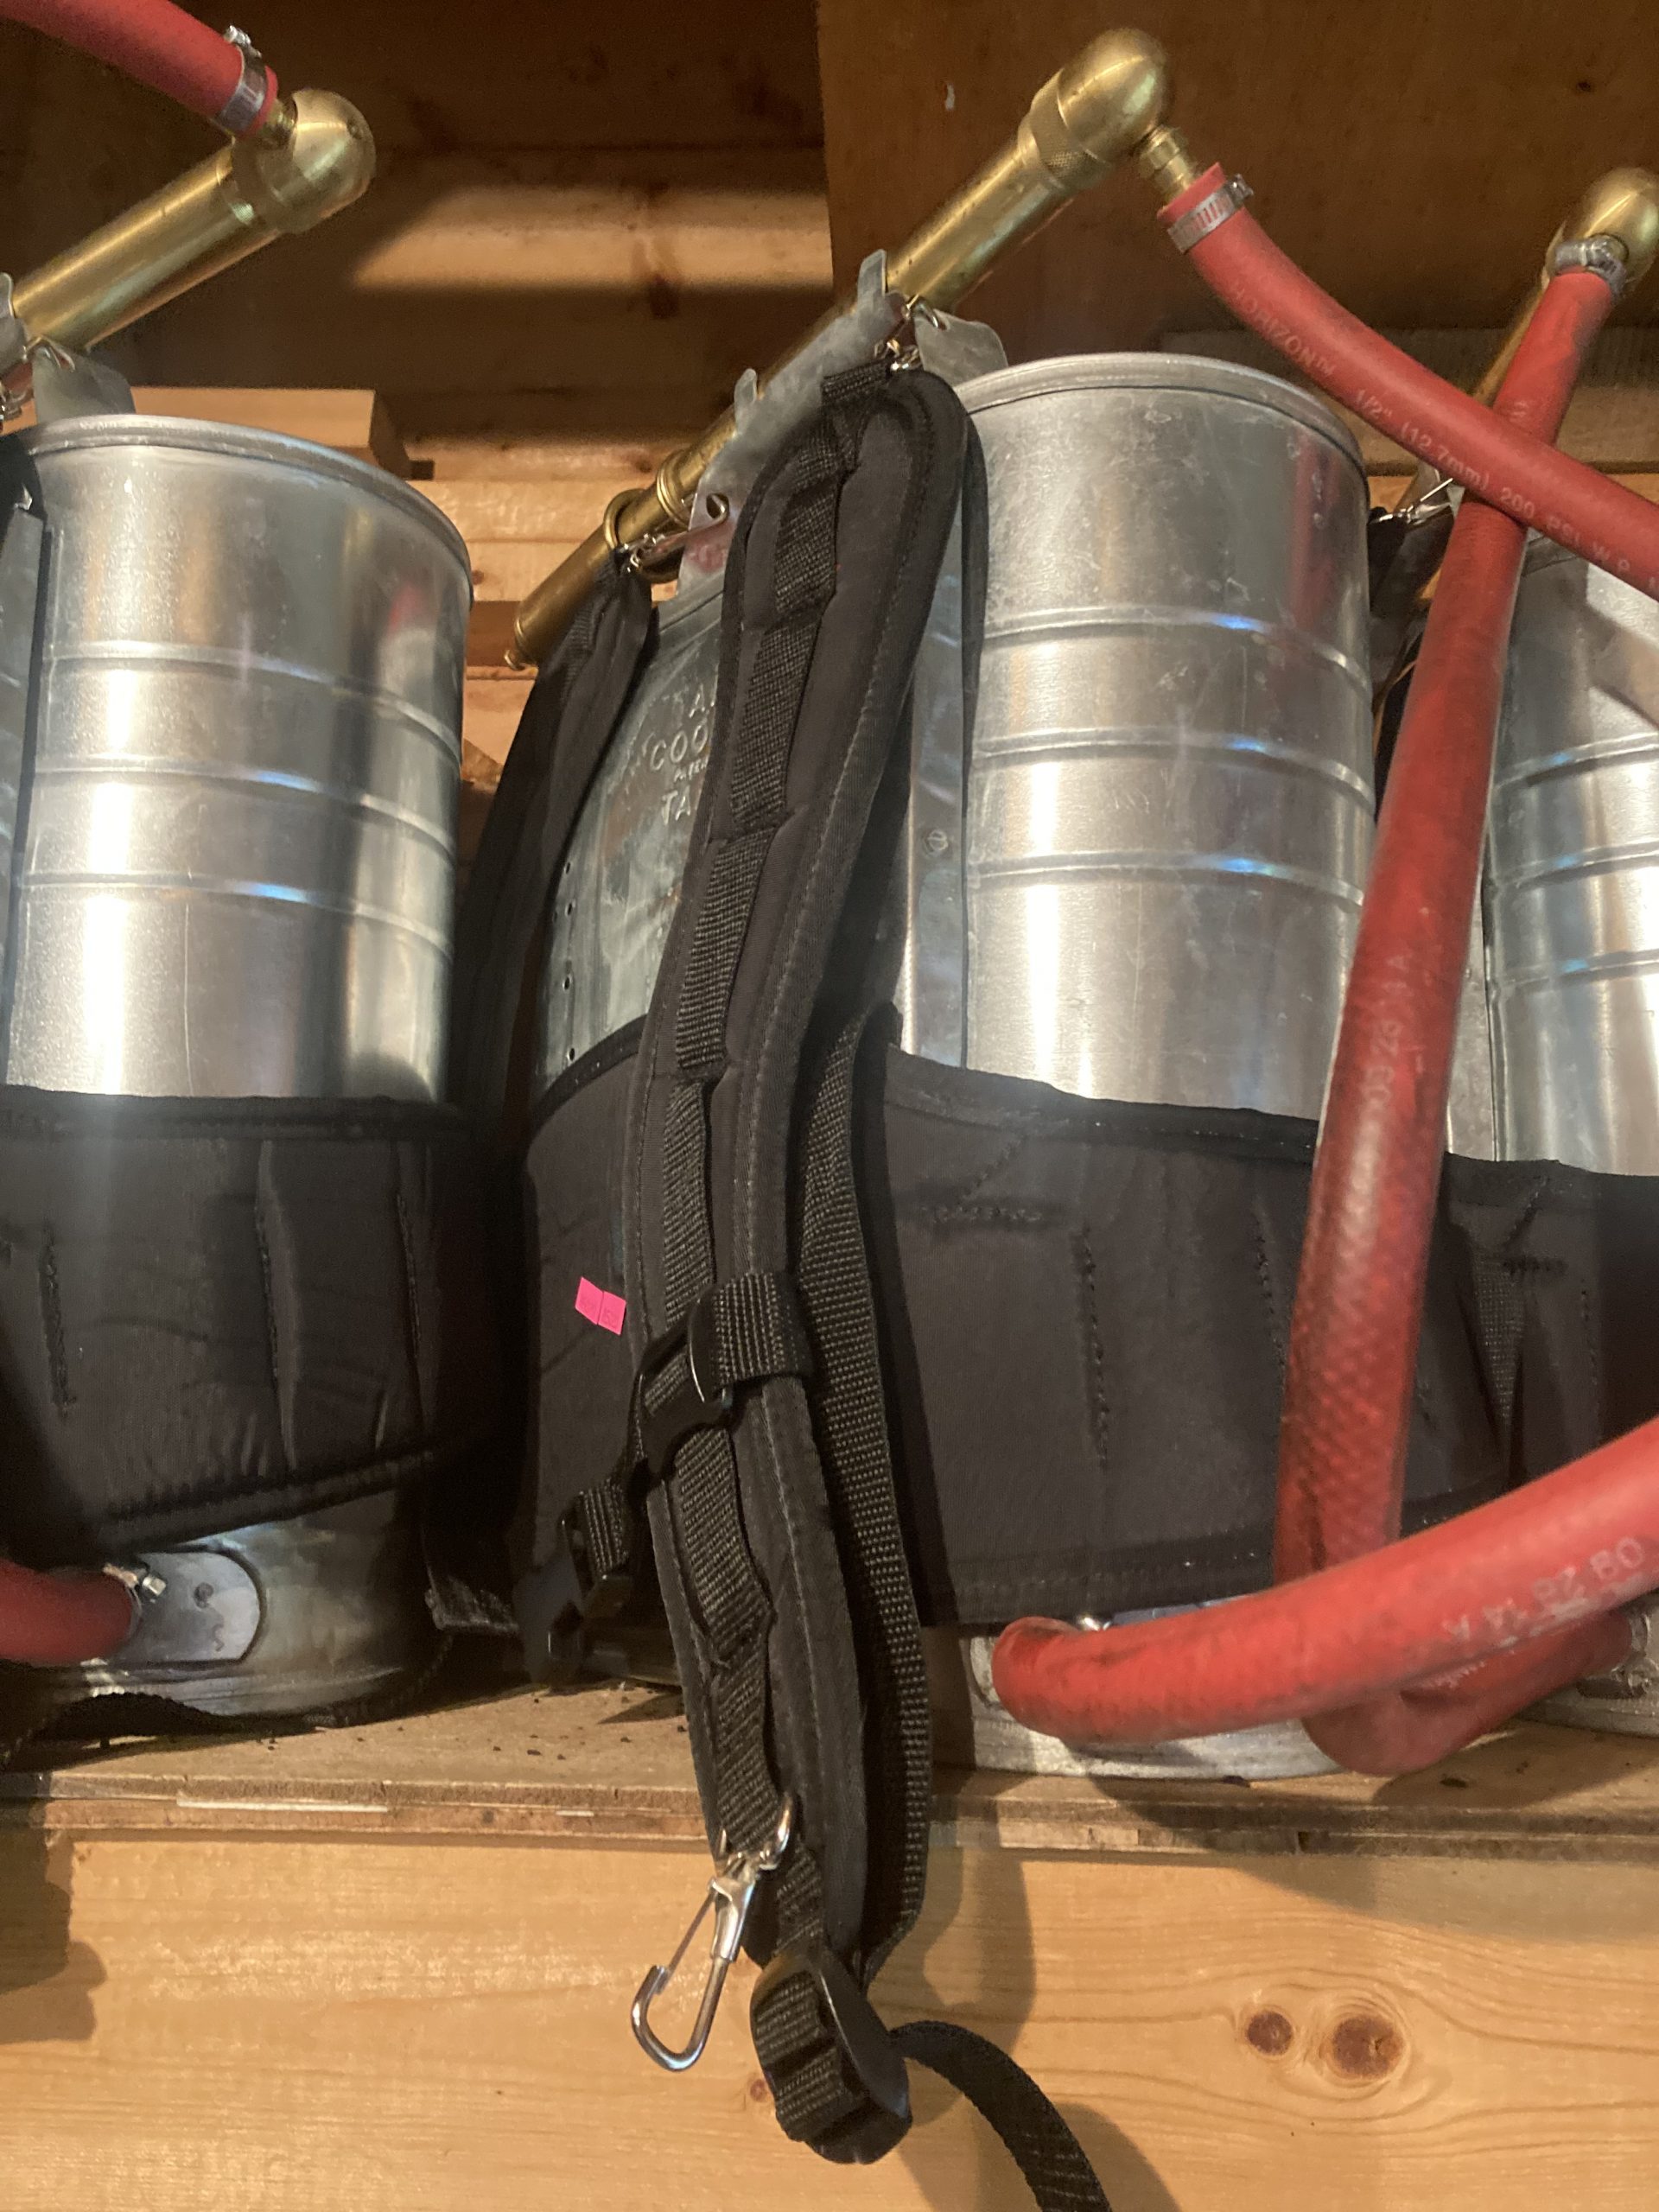
During spring 2021, I noticed two of our 5-gallon backpack pumps had cracked pump cylinders and would need to be replaced. I tried applying plumber’s epoxy to the cracked cylinders last spring but the pressure created by the pump inevitably caused this epoxy to fail. Over the summer, we purchased replacement outer cylinders for the backpack pump assemblies. I rebuilt the pump assemblies and installed these cylinders last week. The pumps seems to be working properly now. We should be very diligent about making sure all water has been expelled from tanks and pump assemblies prior to winter storage to avoid cracked cylinders. We also purchased four harnesses and two pairs of padded straps for our 5-gallon pumps. These provide a welcome upgrade over the notoriously uncomfortable thin straps that come with the backpack pumps. We now should have 6 fully functional (and comfortable!) backpack pumps for burning.
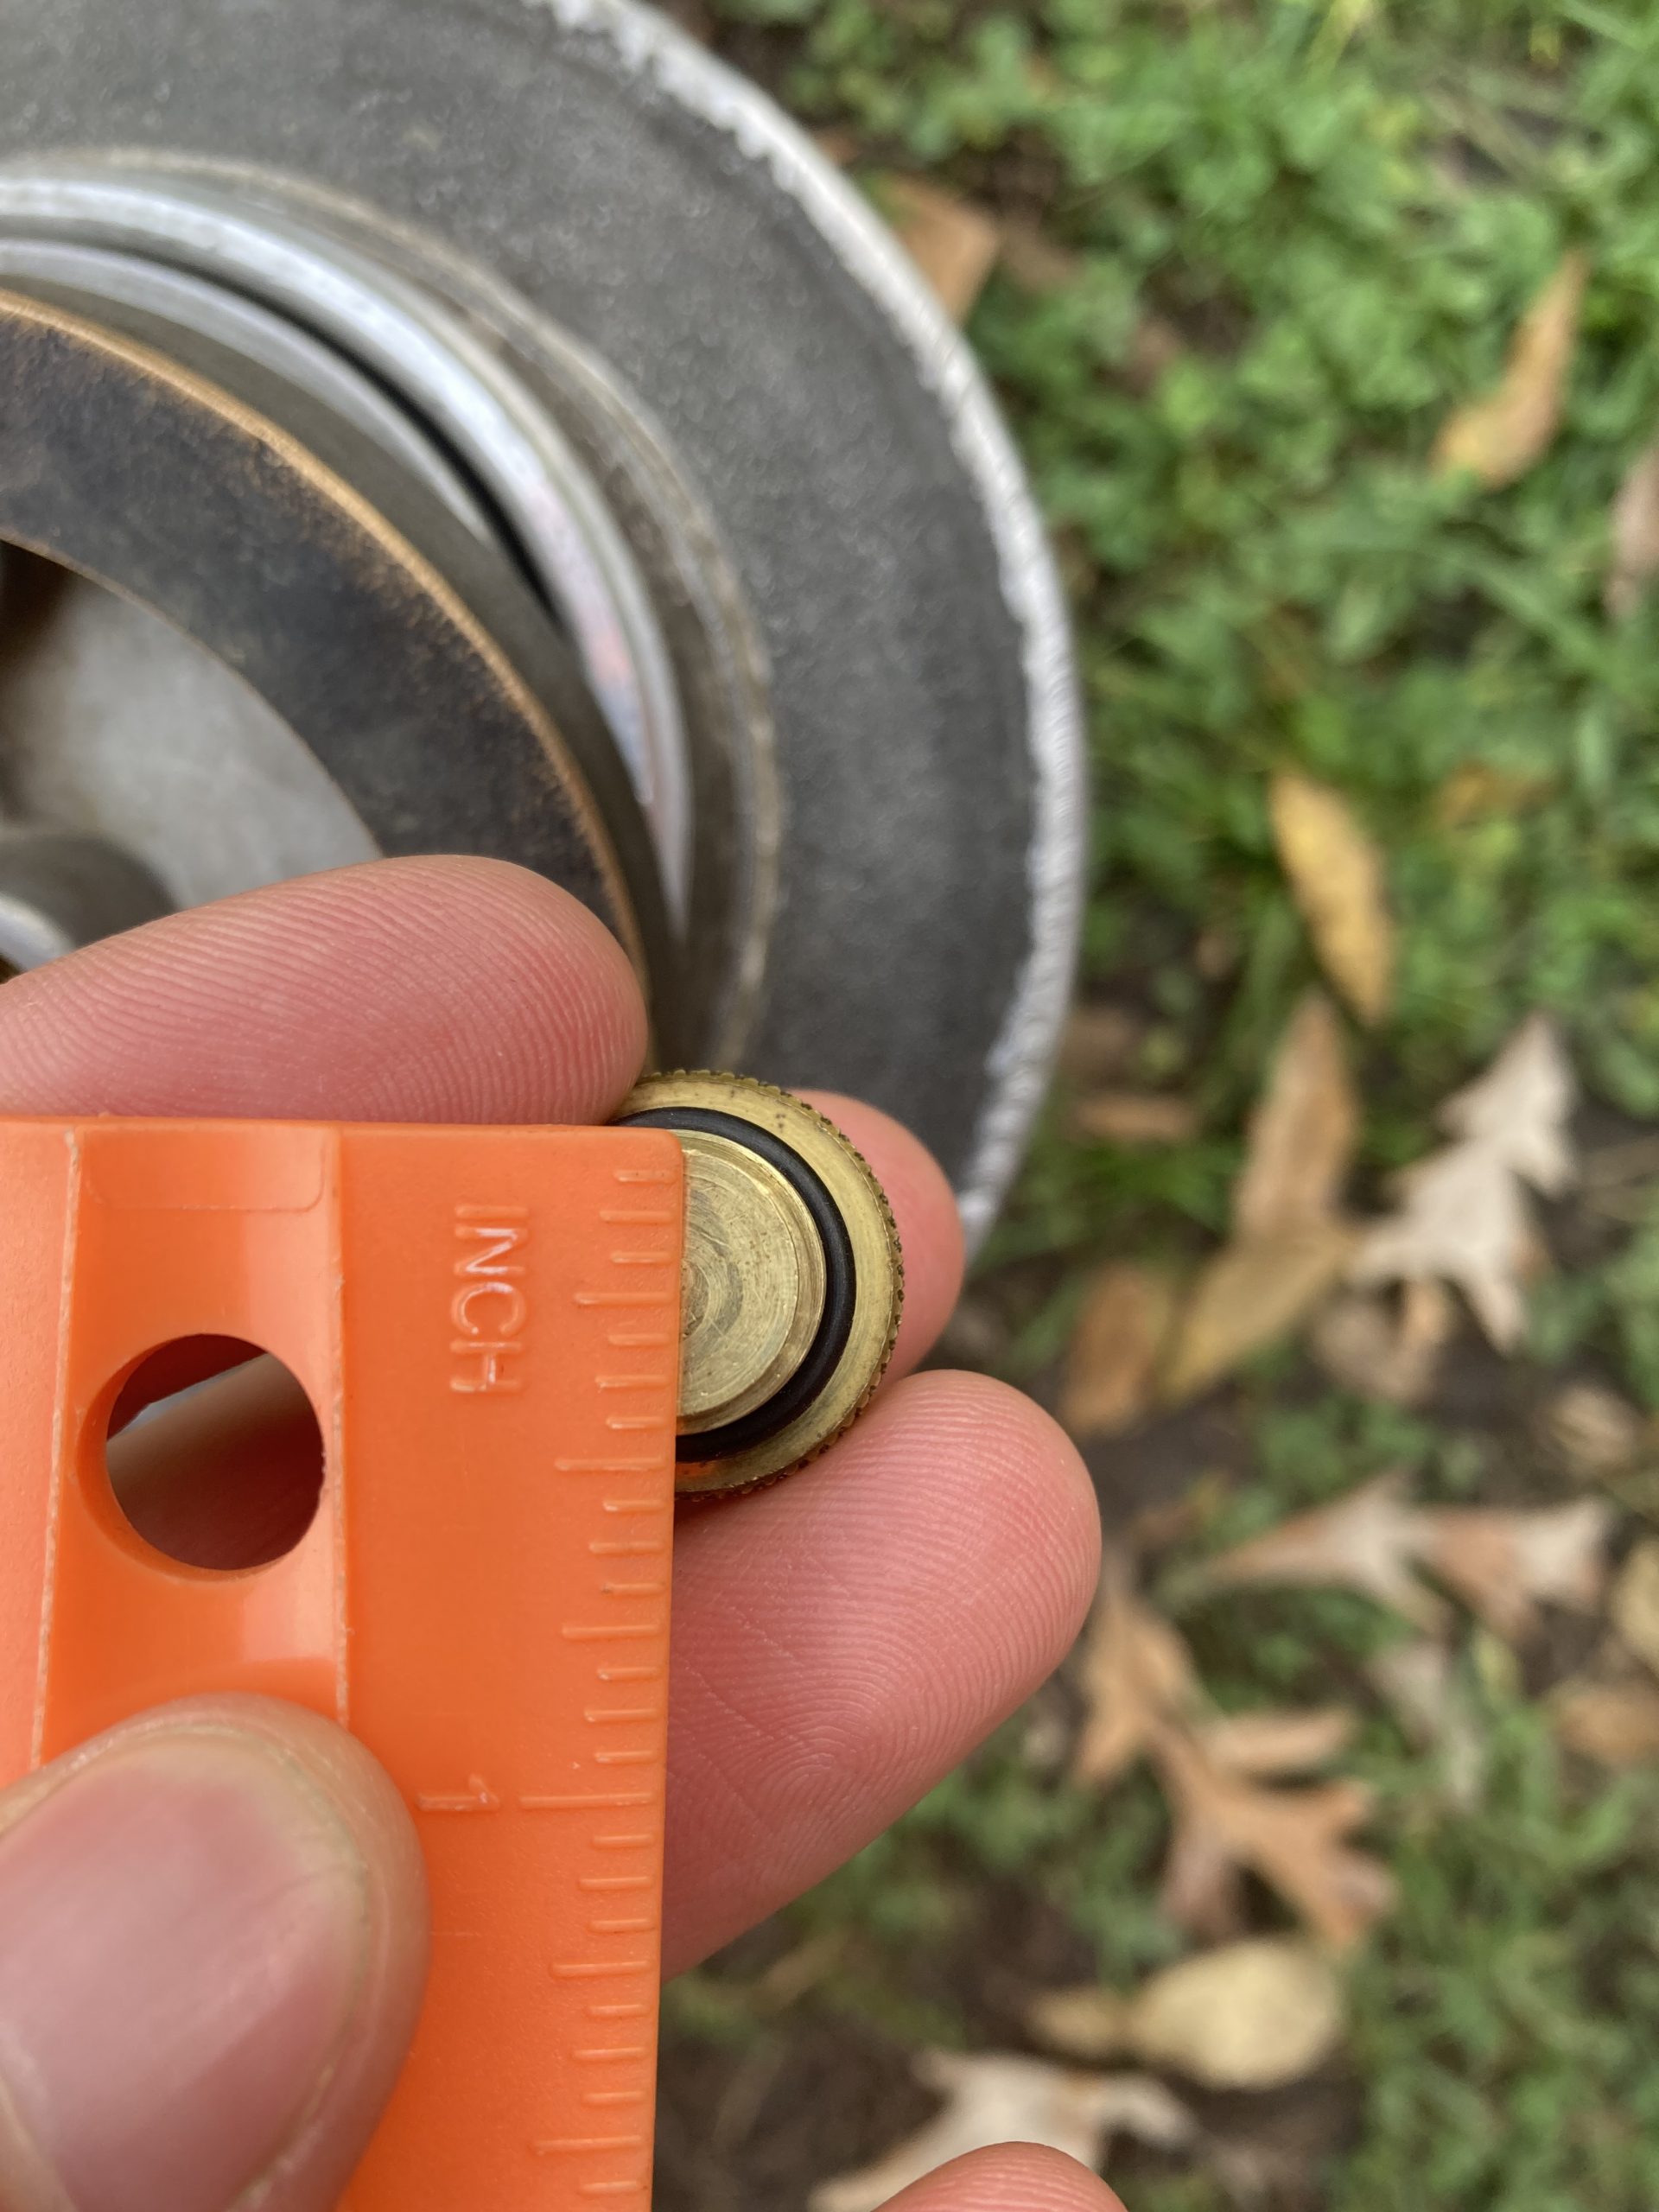
Rebuilding the troublesome drip torch was a priority for me. After inspecting the torch, I realized one if not the problem was a badly deteriorating collar gasket (the big O-ring). I replaced this gasket along with the smaller O-ring on the discharge plug. Pro-tip: Forestry Suppliers sells discharge plug O-rings for drip torches but the ones they sell are too large. I found the #9 O-rings (5/8 in. outer diameter x 7/16 in. inner diameter x 3/32 in. wall) that are readily available at just about any hardware store work much better. I also replaced the breather valve assembly on this drip torch. This brings up a more general point about the importance of maintaining burn equipment. At the beginning of the burn season we should:
At the end of the season:
Counting the total number of achenes provides important information regarding seed set to access the female fitness. Before you start to count achenes you may want to get adjusted to looking at them. Under the tab “Useful Links” on the echinaceaproject.org/lab page you will find “Developing Your Echinacea Eyes” click on it to get familiar with the different types of achenes you may see. Achenes range from rays to tiny achenes so it’s important to make sure you know what to count( Figure 1). 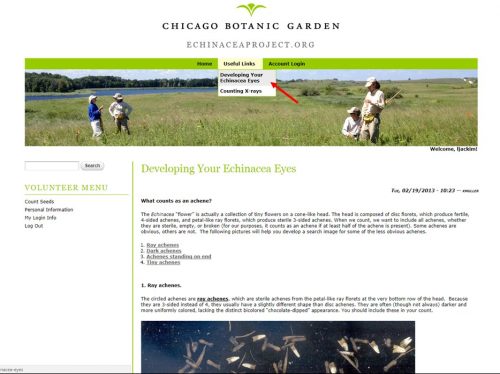 Figure 1. Familiarize yourself with what different achenes look like The “counters” (people who count achenes) use the scanned image of the achenes to count how many achenes come from a single head. This is done by logging on to the echinaceaproject.org/lab website to access the page to count seeds; a detailed protocol is available in lab. All volunteers and staff will need a username and password for this website to be set up in advance. Once logged on to the website, click the link under the side Menu entitled “Count Seeds” (Figure 2). 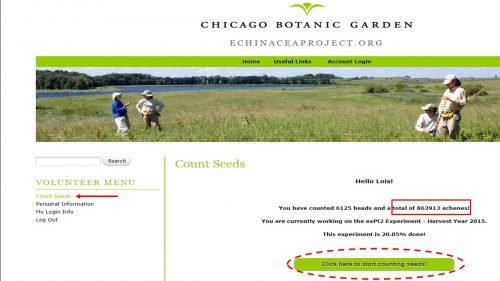 Figure 2. Lois (the Achene Queen) has counted 862,912 achenes and counting… This will then lead you to another screen where you will have information on the progress of the project you are working on as well as the number of seeds you have counted. The example shows our Achene Queen Lois’ stats, she has counted well over 800,000 achenes! Start counting seeds by clicking on the green button aptly titled “Click here to start counting seeds!” (Figure 2). The next page will provide you with a set of questions to answer regarding the head from which you will count seeds. The letno (Letter/Number combination) of the head will be provided and you should open the image in a separate tab. Once you see the image is of good quality you will be shown the envelope that should have the same letno combination (Figure 3). 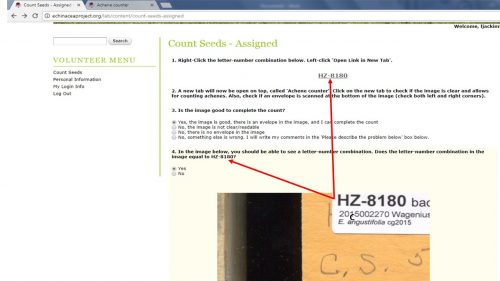 Figure 3. Make sure you are counting achenes from the correct Echinacea head! At times there is nothing in the image in question four but if the envelope in the scan you opened matches the letno the question asks about then you should mark “yes” they do match (Figure 4). 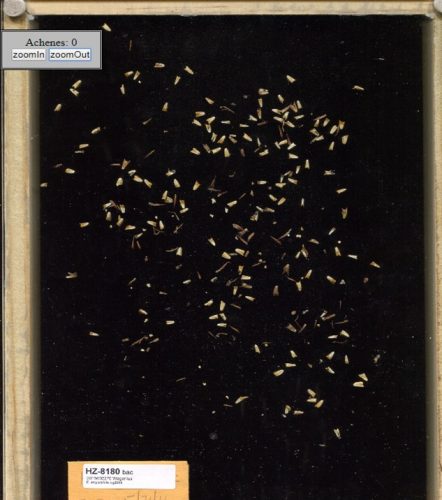 Figure 4. Full image of achenes with the envelope and LetNo in lower left corner
In the tab with the scanned image you will see a floating counter. When you click on an achene you will see a cyan dot appear and the number of dots, i.e. achenes, will be recorded (Figure 5). You can get rid of dots by double clicking on them and the counter will adjust to a new total. 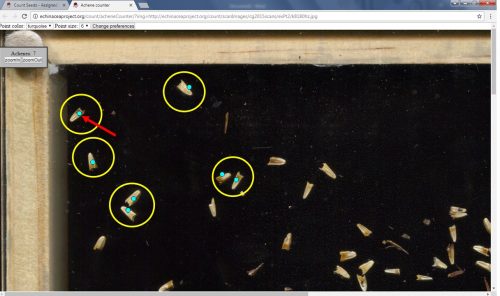 Figure 5. Circled achenes that have been counted. Red arrow points to a cyan dot that the floating counter in upper left corner tracks. Once you have counted all the achenes the total should be recorded in question five (Figure 6). Once you are done with that head you can submit the information and you will be asked if you want to count another head. 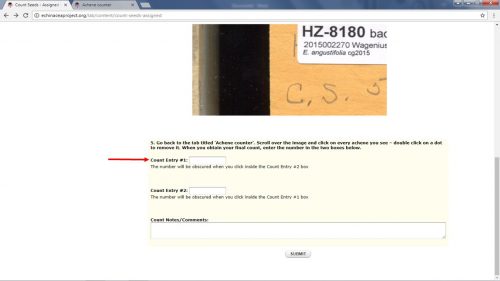 Figure 6. Return to the other tab and fill in the count information Now you can start counting like the Achene Queen Lois!
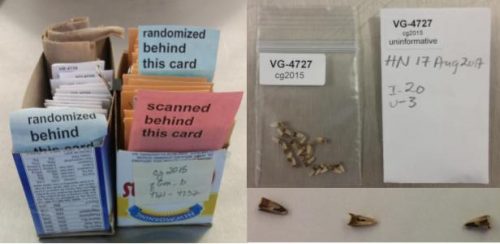
The next step of the ACE protocol is to take a random sample of all the achenes which will then be x-rayed for seed set and viability. The randomness of the sampling is important to not introduce any potential biases in which achenes are chosen. If only potentially fertilized achenes were chosen then this would lead to bias in the data; thence, inaccuracy in assessing the experiments from which they came. The sampling of all the achenes will then be separated into informative and uninformative categories. The informative achenes will be x-rayed since they will be able to inform whether or not there is a viable embryo inside the achene. The uninformatives are those that have been damaged, eaten by a critter, or “tinies”/ “micros” that were never fertilized. There is a reference image to help determine whether achenes are informative or not (see image below). 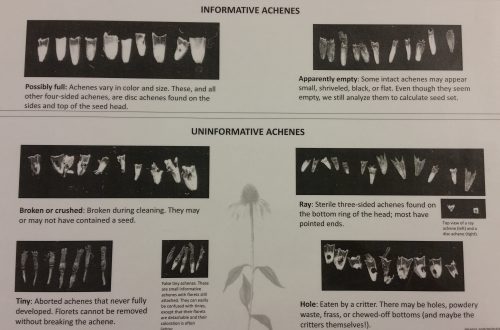 General guide of how to identify the differences between informative and uninformative achenes Detailed instructions of how to take a random sampling is in the protocols folder. The envelopes, segmented circle and achene counter paper is located in the cabinet to the right of the center area close to the windows. The achenes to be used are in the box that has “scanned behind this card” present. The informative achenes get placed in the clear plastic baggies located in the drawer labelled “plastic baggies” make sure to use the “Good Ones” in the drawer. The uninformative achenes get placed in a small white envelope. Both get a label that corresponds to the original manila envelope from which it came. Spread the achenes evenly around a circle. Randomly select two segments to separate into informative and uninformative. These two segments account for about 1/6th of the total achenes. Record the number of informative and uninformative achenes from that envelope on a sheet (see image below). Once achenes from the manila envelope are sampled both the manila achene and chaff envelopes are placed behind a marker “randomized behind this card.” 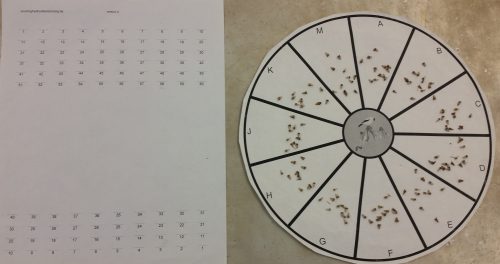 Once the achenes are evenly distributed on the circle two segments are randomly selected and separated into informative and uninformative achenes It can also be helpful to write this number on the white envelope. The white envelope and clear baggie containing 1/6th of the achenes are placed in another box. After this point the informative achenes will be x-rayed.
The next post will focus on what happens after the achenes have been scanned: COUNTING!
The scanned image of all the individual achenes will be used to count the number of achenes for that one head . This process allows for increased accuracy in assessing female fitness by allowing for a precise count of total achenes per head. There is a document for the protocol of each step of scanning in addition to particular settings for the scanning software (please refer to that document for details). The document can be found in the “Protocols” folder in the lab by the light switch. First, the achenes are spread on a glass frame which is stored in the cabinet labeled “Trays for Scanning.” Spread the contents of the envelope onto the frame making sure that there are no achenes along the edge. Important to this process is that there are no overlapping achenes and that none are standing on end. Next, the envelope with the achene information should be placed at the bottom left of the glass (see image below). This whole setup is covered with a lid of a box top cover in black fabric NOT the cover that comes with the scanner. 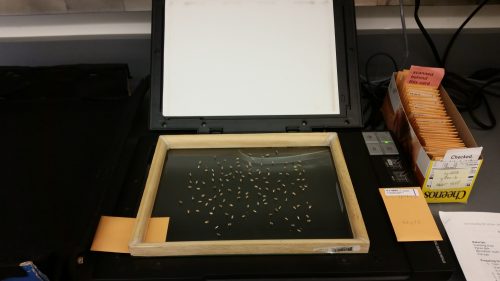 The basic setup of scanning achenes. Double click the “VueScan” icon on the desktop to open. Make sure the settings correspond to those that are in the protocol that can be found in “Protocols” folder in the lab (once the setting is made a first time it remains but it is still a good idea to double check). The scans should be stored in a “Default Folder” on the computer; the name of the folder changes each year. The 2015 scans will be stored on the C drive in the folder entitled cg2015scans. This folder will change with the collection year. Each scan is named according to the letno on the envelope. Once the achenes are scanned they get placed back in the envelope and any chaff or dust that may be left is put in the chaff envelope. The scanned achene envelope is then moved to the back of the box behind the marker “Scanned behind this paper.” After a box is done being scanned the envelopes of achenes and chaff move to the next step of random sampling. 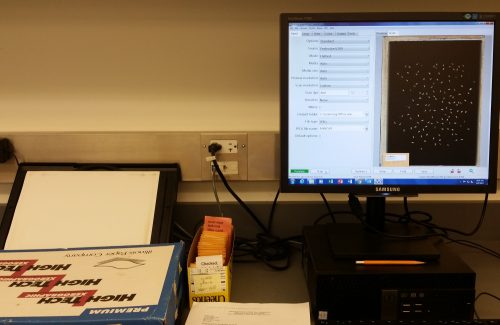 Scanned image as seen in VueScan software. Note that a box lid is used to cover the scanner bed not the original cover. Once the initial cleaning of Echinacea heads has been completed the next step in the ACE workflow is (re)checking. Checking is an important step to get a precise count of achenes per head to accurately measure plant fitness. The bags with the cleaned head, achenes, and chaff are checked to ensure that there are no achenes in the chaff or left on the head. Once the envelopes have been thoroughly checked they are labelled according to experiment. Both envelopes are then organized numerically in a box where the next step is to be scanned. 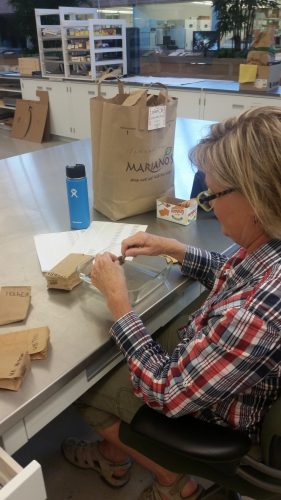 Kathryn checking Echinacea heads and chaff for stray achenes After this point paper markers are used to identify where in the ACE process the envelopes are. Once checking is complete a paper marker that reads “Checked, labeled, & ready for scanning behind this card” is placed in the box. As volunteers work through the process the paper markers are moved to the appropriate positions (see images below).The next stop on the achenes’ trip is to the scanner to accurately count everything (all the achenes) from the image.
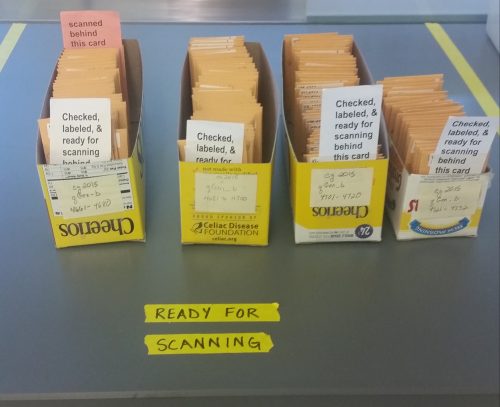 Boxes of achenes and corresponding chaff envelopes in sequential order in the “Ready to be Scanned” area. 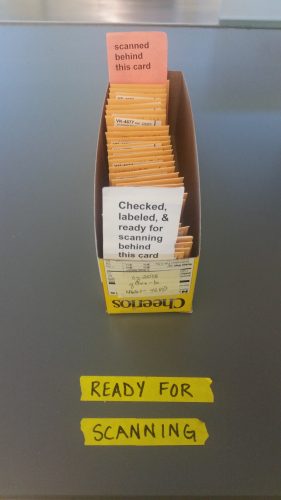 Box with markers indicating it has been not only checked but also some achenes have been scanned. Once the flower heads are harvested for each of the experiments the achenes (seeds) need to be separated from the rest of the head (chaff). The achenes are the important part as they will inform the results of the experiments. All volunteers and staff are blind to which experiment is which so that there will be no bias as to how many achenes “should” be present for each experiment. The process of cleaning heads can be involved and each person has their own technique. The first step is to label two envelopes: one for the achenes and the other for chaff. The label should have the number of the experiment with the twist tie color, your initials with the date, and then chaff or achene. There is a separate datasheet that has each head detailed where you should cross reference the information and initial with the date. (see below for example). 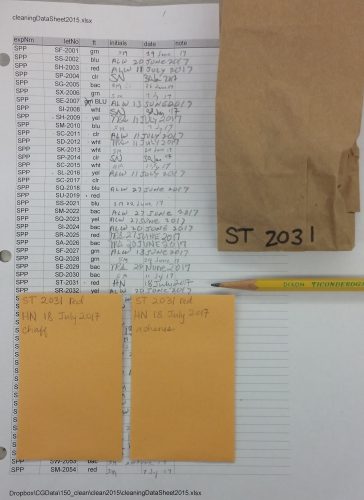 Example of how to label an envelope and cross check the datasheet where you can write notes such as if a twist tie is missing or a different color While cleaning it is important not to damage any achenes in the process (though this will happen). People use a variety of tools and techniques to clean a head from toothpicks to tweezers. The stem may be prickly so if you are like me you may need use a napkin or gloves to protect your fingers. There may be achenes that were damaged by critters that took a bite but these should still be placed in the “Achene” envelope. The achenes at the bottom of the flower head are called ray achenes and should also be included in the achene envelope. These can be “hidden” and hard to clean so be patient and thorough. Achenes may be have florets attached which can be left on. Separate the achenes and chaff (a strainer/sieve can be of great help) and place them into the appropriate envelope. Once a head is cleaned put it back in the original little brown bag with the twist tie as well as the two envelopes. These finished bags are but into a big box. Once all the heads from one experiment are cleaned the box moves on to the checking process to ensure there are no stray achenes in the chaff or head. “Check” out the next post for more details…. 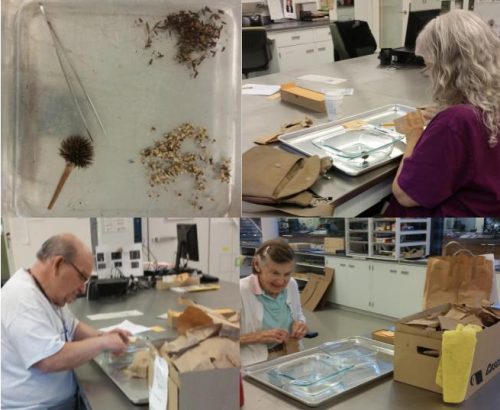 Clockwise: Cleaned head with achenes and chaff separated; Some of our star cleaners Naomi; Susie; Alan. Note in the above photos the little brown bag with a head is taken from the large brown bag and when cleaned placed in the cardboard box. P.S. Today Susie cleaned the last head collected from 2015! She already started on the 2016 experiments : ) Welcome! This first post will introduce the Accurately Counting Everything (ACE) workflow. This is the standard protocol for the work done in the Echinacea lab at the Chicago Botanic Garden. While work is being conducted in the field here in the lab volunteers continue to progress through the flower heads collected the previous summer. You can explore the flog to get more acquainted with the details of the experiments and projects. The main goal in the lab is to process Echinacea angustifolia flower heads in order to quantify female fitness and seed set.
The main steps of the ACE workflow with the names of some of the volunteers that implement it are: 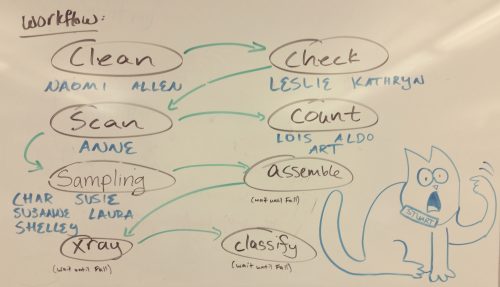 Great illustration by Scott of ACE workflow
The tireless efforts of our amazing volunteers and lab members are key to the Echinacea Project! 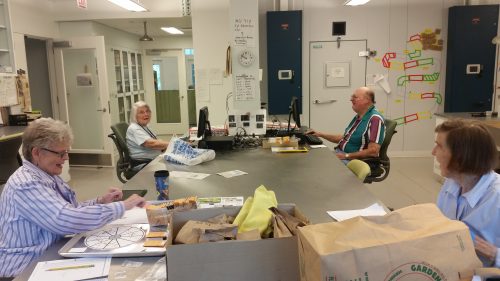 Tuesday morning volunteer community implementing ACE workflow. From top left clockwise: Lois counting achenes from a scan; Aldo counting achenes from a scan; Susie cleaning heads; Char sampling achenes for x-raying.
Future flog posts will detail each step. Check out the next post about how to clean flower heads to separate achenes (seeds) from the chaff like an ACE…
~Hilary Hey again Flog, My name is Sam Hamilton and this is my second post on the Flog. In my first post, I focused on the experimental goals of the SppBonus project, the kind of data we are measuring, and the project’s relevance to understanding reproductive success in fragmented prairie remnants. Today, I will talk about the progress I’ve made, and the methods I’ve used to move this project from seed head to data set. The first step of this project was to extract the achenes from the seed heads. Flowers of the Aster family, including Echinacea, are compound flowers, many flowers that grow together to look like one large flower. In Echinacea, each of these flowers, regardless of whether it is pollinated or not, produces a fruit called an achene. By measuring how many achenes contain seeds, we can estimate how well a flower was pollinated in a given year. Thus, in a project like SppBonus, the first step is to extract the seeds from the seed head. The SppBonus data set contained 32 different seed heads, which took me roughly a month to completely clean and organize into samples taken from the top, middle, and bottom of each flower. The second step is to scan all the gathered achenes so that we can count the total number of achenes. This is an important metric to measure the reproductive fitness of each Echinacea plant. This was a fairly fast process and it only took me three days to scan the achenes from each seed head. The third step is randomization. We ultimately determine whether or not an achene contains a seed by X-ray. However, there are simply too many seeds to X-ray them all efficiently. Thus, we take a sample from our seeds, X-ray those, and then use that data to make assumptions about the seed set as a whole. We randomize our samples, to ensure our samples are representative of their populations. Without this step, we risk choosing achenes that are the easiest to count, or best fit our expectations of what the data will look like. Our randomization procedure involves pouring the seeds onto a grid where each cell is assigned a letter and a number. A second sheet has these letter and number combinations in a random order and we go down the list selecting from each cell until we’ve collected thirty achenes total. This is the part of the project I’m working on now! When not working on SppBonus, I am spending my time reading and discussing papers about fire and its effects on pollination and germination with Stuart, Amy, and Scott. I learn a lot from listening, and it’s always interesting to hear their insights into the merits and flaws of each paper, as well as to watch them design new experiments from the ground up. Hopefully I didn’t bore you, until next time!
Today was my last day of work for this summer. It was also Hattie and Per’s last days. They go back to school next week! It’s crazy how much this summer has flown by! To inaugurate my last day we started with rechecking demography records. We then had our last lunch with the Wagenius’ as a whole. They are headed off towards Chicago where Gretel, Hattie, and Per will be staying for the fall (Gretel will be back and forth). The afternoon became warmer and the sky cleared up. The rest of the team got trained in on how to harvest Echinacea heads in P1. I stayed behind to finish up some work on my independent project. At the end of the day Abby and Will left without saying goodbye (I wish you both good luck in the new school year and hope that excellent times come your way). But out biggest trouble was figuring out what to do with Ricarda/Ricardo/Erica/Rica/Ric/Rick/Richard/Ricky. We debated whether to let him go on the grape vine outside the Hjelm house or to bring him back to town hall. We ultimately decided to let Ricarda/Ricardo/Erica/Rica/Ric/Rick/Richard/Ricky go on the grape vine outside of the Hjelm house. We then headed home for our usual Friday night pizza making session! We made wonderful veggie, sausage and green pepper, and pineapple pizzas! We then went outside to watch the sunset through the smoke from the wildfires in Montana and Washington. The sun was a beautiful orb of orange as it set over the soybean fields to the west of K-town. Then someone put Kent in the shower.  Well hello there Kent! |
|
|||
|
© 2025 The Echinacea Project - All Rights Reserved - Log in Powered by WordPress & Atahualpa |
||||