Categories

X-raying Echinacea seeds


What is a typical radiation dose experienced by an Echinacea seed when we x-ray Echinacea fruits to assess seed set?

We usually put the seeds on the bottom tray and the setting 10 s @ 18 kV. According to the documentation on dosage for our x-ray machine 18 kV outputs 292.6 R/h when the dosimeter probe is 57.2 cm away (that's the shelf with 1:1 magnification). The dose unit quote here R is Roetngen.

A little arithmetic can tell us total Roentgens for a ten second exposure:

( 10 s frac{1 h}{60 min} frac{1 min}{60 s} 292.6 frac{R}{h} )

In R code, that's

10 * 1/60 * 1/60 * 292.6
## [1] 0.8128

0.8128 R (Roentgen)

We may put the seeds on a higher shelf for more magnification, maybe 1:1.5 or the 1:2. We can enter dosages from each shelf from the documenation on exposure levels by shelf to estimate how much higher the dose is.

lvl <- c(1, 1.5, 2, 3, 4, 5)
RPM <- c(7.815, 20.55, 42.55, 115.45, 232, 397)
data.frame(shelf = lvl, dose = RPM)
##   shelf    dose
## 1   1.0   7.815
## 2   1.5  20.550
## 3   2.0  42.550
## 4   3.0 115.450
## 5   4.0 232.000
## 6   5.0 397.000

The dose on the 2x magnification shelf is RPM[3]/RPM[1] = 5.4447 times greater than the dose on the 1:1 shelf. Doubling the magnification generally should increase the dose by a factor of 5.4. Let's check: the dose on the 4x shelf is RPM[5]/RPM[3] = 5.4524 times greater than the dose on the 2x shelf. Also, the dose on the 3x shelf is RPM[4]/RPM[2] = 5.618 times greater than the dose on the 1.5x shelf. Close.

The expected dose at the stadard settings is 0.82 R on the bottom shelf and 0.8128 * 5.5 = 4.4704, or about 4.5 R on the 2x shelf.

party

We had a great party on Tuesday night–Dayvis & Marie’s last day. We enjoyed excellent food, played croquet, and ate s’mores around two bonfires. Very enjoyable. The garden is late this year–no tomatoes or cucumbers yet. I regret I didn’t take any photos, but here’s the menu…

corn on the cob
pesto pasta
Pam’s pasta salad
quinoa salad
fresh sourdough bread
black bean dip
corn chips
deviled eggs
kohlrabi slices
brownies
iced tea
s’mores makings

When to harvest Echinacea

For many of our experiments we want to harvest Echinacea heads when they are as ripe as possible, but before any achenes have dropped.

The standard harvest indicators are as follows:

  1. Phyllaries (involucral bracts) are brown
  2. Bracts that subtend each disc floret are brown and sharp
  3. Flower stalk (peduncle) is brown (not purple)
  4. 1st (uppermost) cauline lf is brown (note: 1st lf may be close to hd!)

Once harvest indicators 1 – 4 are positive, or if a head has loose achenes or is in some way deformed and you think achenes may be lost before the next harvest, harvest the hd! Make sure to look for loose achenes at the top of every hd with brown bracts.

Harvest a head by cutting it off and placing it carefully into a labeled bag. When cutting the hd off, hold the head firmly in one hand and cut the peduncle with the pruners 3-5 cm under the hd. You don’t need to open the bag all the way and the hd doesn’t need to go all the way to the bottom of the bag.

That’s our standard harvest protocol! Everything’s flowering so late this year, we won’t be harvesting for a while, but I wanted to post this while I was thinking about it.

Welcome Miss Z

Sara Zufan, aka “Miss Z,” arrived from Chicago, IL (pop > 1 x 10^6 people) to Kensington Minnesota (pop = 280) this weekend and is already hard at work measuring plants and searching for the elusive Stipa grass in the sea of other grasses that is our common garden experiment. Miss Z is teacher in Chicago Public Schools at the Multicultural Academy of Scholarship. Next year she is teaching AP Biology, Regular Biology, and Earth & Space. This summer Miss Z plans to gain some hands-on cutting-edge field biology experience to enhance her professional development as a secondary school science educator. Miss Z is going to figure out how to bring her new knowledge into her classroom this coming school year.

Stay tuned! Miss Z will keep you posted via this blog and twitter on her research endeavors and experiences in the field this summer as she investigates the ecology and evolution of plants and animals in the fragmented tallgrass prairie with the Echinacea Project.

Team work in week two

The second week of the 2013 field season for Team Echinacea was excellent. We finished searching for seedlings and found a grand total of 102 seedlings in 13 remnant populations. We laid out the main common garden experiment with over a thousand orange, blue, and lime flags to guide our walking and to enable us to identify individual plants. We also began assessing survival in the recruitment experiment. On Wednesday Ilse presented results to the team on her aster analysis of 17-year fitness records for about 600 Echinacea plants in our main common garden experiment–details to follow. Pam took out her big new photosynthesis machine for its first trial run. Storms and wetness rained us out all day Thursday and we were without power for two hours on Thursday and about 18 hours on Friday. Team members are refining their ideas for independent projects and soon will be able to make their own posts. (IT folks at the UMN said they fixed the access problems-we’ll see.) Stay tuned to read about their awesome experimental plans!

You can read about some of our team-members on our their Echinacea Project webpages…
Pamela Kittelson
Ilse Renner
Dayvis Blasini
Kory Kolis
Sarah Baker
Marie Schaedel
Reina Nielsen
What a great team!

Next week we aim to finish assessing survival, flag another experimental plot, measure more plants, work on independent projects, and purchase/make/organize equipment and supplies for our experiments. We are also looking forward to Amy Dykstra’s visit. She will talk about her dissertation research.

We are making updates via twitter and facebook. These media have proved to be more reliable than this flog, but we hope that changes soon. See links on the Echinacea Project’s main web page. We hope to set up a venue for sharing more of our photos–stay tuned for that, but here are a few photos from this past week…

IMG_1540.JPG

Searching for seedlings at LF (the landfill site).

IMG_1541.JPG

An orchid (Cypripedium calceolus)
flowering at the KJ site.

IMG_1545.JPG

The team on the porch of the Hjelm house.

IMG_1551.JPG

First trial of the new phtosynthesis machine.

IMG_1555.JPG

Sorting flags to reuse & recycle.
We estimated 2600 flags here to reuse.

busy at work–without flogging

Team Echinacea in Minnesota had a busy and productive first week of field work. Unfortunately we have been unable to log in to the flog to tell you what we have been doing. Something at the U has changed how to log in and we are stuck–arg. We will update you as soon as we can! This week we plan to search for Echinacea seedlings, flag the main common garden experiment, and start assessing survival in the recruitment experiment. I hope team members will be able to update progress on their independent projects.

Field trip to MN (22 – 26 May)

I drove from the Chicago Botanic Garden to our field site in western Minnesota hoping for a window of appropriate burning weather on Thursday afternoon or Friday afternoon. I also brought 297 Echinacea seedlings to plant as part of an experiment that investigates hybridization between native and non-native Echinacea. Several gallons of side-oats grama grass seed were waiting to be hand broadcast at two sites after the burn.

Why burn?
We want to burn our large Echinacea “common garden experiment.” In this abandoned field we have planted about 14000 individual Echinacea plants, starting in 1996, and measured their growth and flowering every year. We have burned this ~6 acre plot every other spring from 1998 to 2008. The weather didn’t cooperate in 2010, so we burned in 2011. We are trying to burn this year! Burning in the spring really increases the chance that an Echinacea plant will flower. We are planning a big crossing experiment this summer, so we want as many plants to flower as possible. Also, burning sets back the weeds–and that is a good thing.

Here’s the quick recap of major activities.
1. Packing
2. Driving to MN
3. Preparing to burn
4. The burn
5. Seeding after the burn
6. Preparing to plant
7. Planting
8. Seeding the phenology plot
9. Driving to IL

photo(3)May2013.JPG

Dwight makes sure the fire stays where it belongs

Read the gory details…

1. Packing
I loaded the truck with lots of field equipment to use during the summer. The seedlings in the hybridization experiment fit in three trays. I had two trays of “extra” seedlings that were still hanging on from Jill’s agar/blotter seed germination experiment. For the burn, I brought three backpack sprayers, the DNR burn permit, and batteries for radios. I forgot to bring a back-up drip torch.

2. Driving to MN
The drive to Minneapolis was generally uneventful, which is just what one wants when driving an 18-year old truck. Very early on Thursday I drove to the site. Shortly before arriving, I saw two Sandhill Cranes landing in a wet field near Holmes City. I think that’s the first time I’ve seen cranes on the ground in Douglas County–auspicious! I should mention that I also saw a Common Loon and Pelicans, which are common every summer in Douglas County. Seeing them makes for an auspicious day too.

3. Preparing to burn
Thursday morning the ground was wet and the wet grass duff (fuel) didn’t look very promising for burning. The erosion in the surrounding corn fields indicated it had rained a lot. Our rain gauge confirmed that showing 3.65 inches (93 mm) of precipitation in the previous week. Light winds and cool temps weren’t helping dry it out, but the sun and low humidity offered a glimmer of hope. It’s rather stressful trying to predict burn weather and decide whether to rally folks to make a long trip to help burn.

photo(0)May2013.JPG

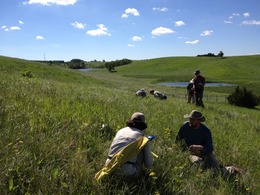
The plot before the burn

Dwight and I began preparations for the burn. Just after noon, it looked like the fuel might dry out enough to burn and the weather forecast looked great, so I let folks know that we were going to attempt to burn in late afternoon. I should add that the fire forecast for Friday was getting worse, so that a burn was going to happen on Thursday or never (well, June or 2014).

Here’s our pre-burn to do list:
Prepare burn break (mower, weed whip, chain saw)
Fill water tank on truck (70 – 80 gallons)
Put six buckets in tractor trailer
Set up hoses [I forgot to set up hoses this year, thus this list]
Fill backpack sprayers
Fill drip torch(es)
Get matches
Activate burn permit
Call sheriff
Call neighbors
Walk burn break with crew & place buckets
Check radios

What to wear during a burn:
100% cotton long-sleeved shirt and long pants
Hat
Leather boots (over ankle, if you have them)
Leather work gloves

4. The burn
Amy, Brad, Dwight, Jean, and I conducted the burn and it went smoothly. Amy made a nice post with photos. The burn was slow and thorough. Ignition initiated at 5:20 and we were done at 8:20. Winds were light ESE ~ 8 mph. We had a great dinner afterward.

photo(1)May2013.JPG

Amy keeps the fire from jumping the road

photo(5)May2013.JPG

Brad and Amy through the smoke

photo(2)May2013.JPG

A slow and thorough burn

Post burn to do list:
Call sheriff
Put everything away–dry out tanks
Broadcast seed

photo(4)May2013.JPG

Some grass is still green right after the fire

5. Seeding after the burn
On Friday I hand broadcast about 2 gallons (8 liters) of native grass seed. More warm season grasses will provide fuel for future fires! The Soras chattering in the neighboring wetland kept me company. Here’s the seed sources–keeping it local!
grocery bag: Bouteloua curtipendula from cg1 10 Aug 2012
grocery bag: Bouteloua curtipendula from Krus 14 Aug 2012
#1 bag: Bouteloua curtipendula (& some Elymus canadensis) from Backhill 19 Aug 2012
#2 bag: Bouteloua curtipendula from Backhill 19 Aug 2012
#2 bag: Bouteloua curtipendula from cg1 22 Aug 2012

photo(11)May2013.JPG

Much of the grass that was green right after the fire is now brown

photo(6)May2013.JPG

I found this Sharpie while broadcasting side-oats grama


6. Preparing to plant

Next job was getting those seedlings in the ground! The forecast was for lots of rain during the upcoming week, which is great for seedlings, and for lots of rain in the afternoon, which is not so great for a person planting seedlings. I had to hurry.

I was quite efficient, except that I paused to watch a pair of Trumpeter Swans at Hegg Lake WMA–another first for me in Douglas County. I got a very nice look at the birds up close and saw the shape and color of their bills–straight and all black. I didn’t hear them, so I’m not 100% positive they were trumpeters. Tundra swans apparently look similar, but I haven’t seen them up close for years.

I chose a uniform location in an area that was planted with warm season grasses in 2000 for this experimental plot. I was considering mowing the area, or at least the rows to facilitate making straight rows and putting the plugs in, but I decided against it.
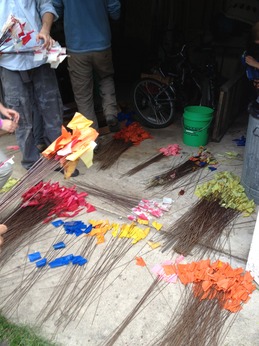
I laid out 300 planting locations (10 m x 30 m) with meter tapes and pin flags. A 9m x 29m grid would be sufficient for 300 locations, but I don’t like to plant at 0m on a tape and I planned to leave a few flags at locations with no plants.

photo(8)May2013.JPG

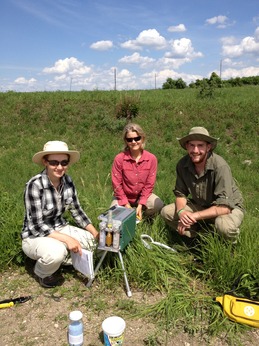
Setting up planting locations

7. Planting

These seedlings all originate from plants that flowered at Hegg Lake last summer. Shona conducted the summer experiment and prepared the seeds for germination. Read about Shona’s project. Jill germinated the seeds this spring and measured the seedlings multiple times. Read about Jill’s project.

I ended up planting one tray (~100 seedlings) on Friday before getting rained out. Planting in the light rain worked for a while, but it was slow. When it really started coming down, I bagged it.

photo(10)May2013.JPG

tools of the trade

On Saturday morning I saw the pair of Trumpeters at the flooded field SW of MN27 & CR1. The nearby Canada Geese were much smaller. A black tern flew overhead. When I arrived at Hegg, I saw fresh truck tracks and what looked like a can of beer and a pair of underwear right in the middle of the parking area. They were not there the day before! Upon closer inspection I realized that it was a can of Nos energy drink, not beer.

Saturday proved to be cold but not too cold. It was 54 degrees F and very windy. I wore nitrile gloves and that kept my hands warm. I planted almost twice as fast as I did when it was raining. The Bobolinks kept me entertained all morning with their bubbling songs.

8. Seeding the phenology plot Saturday 1:11 – 1:42 pm
Right after finishing planting I went to the phenology plot and broadcast some native seeds that we collected last fall. I broadcast the seed fast and it dispersed well in the strong and gusty wind. There is a new fox den with a big pile of dirt in the middle of the plot. The only plants I saw flowering were Sambucus, Dandelion, and Antennaria. I’m sure others have been flowering, but it was overcast and cold and I was moving fast. As I left Hegg Lake a wild Turkey walked out in the road in front of my truck. So nice to see.

I planted ~ 2.5 gallons of seed from three collections:
1. Bouteloua curtipendula from Hegg Lake WMA 13 Aug 2012 (#4 bag). 2. Bouteloua curtipendula from NE corner of Hegg Lake WMA 27 Aug 2012 (grocery bag). 3. Schizachyrium scoparium (& some Bouteloua curtipendula) from along CR 15 at Hegg Lake WMA 16 Sept 2012 (grocery bag).

9. Driving to IL
I left around 5:45 AM on Sunday. As I climbed in the truck I heard a Great-crested flycatcher–first of the season–so, I suspected it would be an auspicious trip. It was a boring drive, just the way I like it. I talked to myself about mating isolation and asynchrony to help prepare for writing a proposal to NSF on this topic.


Postscript.
I didn’t have time to plant a few of Maria’s left-over Dichanthelium plants. Jean said she would be glad to plant them in her prairie garden. photo(7)May2013.JPG

Maria’s Dichanthelium plants. Some have been exposed to cold temperatures for the past month or so.

Presentation at Life Discovery – Doing Science Inaugural Education Conference

Greg Diersen gave an oral presentation “Pollinator Collecting for the Lab and Classroom” at the Life Discovery – Doing Science Inaugural Education Conference on Mar 15-16 in St. Paul, Minnesota.

As a science teacher participant in the Echinacea project through the National Science Foundation RET program, Greg developed a lesson plan for experimentally pan-trapping pollinators to use in secondary and post-secondary biology classes. This experiment offers diverse opportunities for doing science, learning biological concepts, and understanding about our changing world.

Greg was a high-school science teacher for 16 years and is now a professor of biology at Martin Luther College in New Ulm, MN. diersegtATmlc-wels.edu

Amy Dykstra graduates

15 January 2013 Amy Dykstra defended her doctoral dissertation, entitled: Seedling recruitment in fragmented populations of Echinacea angustifolia and passed with flying colors!  Members of the committee referred to her research as extremely impressive and highly valuable to restoration biologists, among others. At the end of January, Amy will return to Bethel University, where she has been teaching since August 2011.

What to do When the Weight Test Fails: Methods to Distinguish between Full and Empty Achenes in Echinacea angustifolia

By Marie Schaedel

Most Echinacea heads have achenes with a clear weight gap between full and empty, which is useful for lab purposes. Sometimes, however, there is no clear difference in weight for full and empty achenes. This winter, I took a closer look at achenes from Echinacea heads that had a continuous pattern of variation in weight to see if there was another way to distinguish between full and empty achenes when the weight test failed. To do this, I reweighed achenes from 20 samples that lacked an obvious weight cutoff. After plotting the new weights in R, I gathered X-ray images of the achenes closest to my best-guess cutoff weight for each sample. I found that more than half of the samples I tested had an intermediate transition weight that divided the full from empty populations of achenes. For ambiguous cases in which there is no clear difference in weight between full and empty achenes, this transition weight can be used to predict the cutoff value.

Read more:What to do when the Weight Test Fails.pdfAppendix

Figures

Figure_4.PNG

Figure 1

Figure_3.png

Figure 2

Figure_1.jpg

Figure 3

Figure_5.PNG

Figure 4

Figure_2.png

Figure 5

X-Ray Images

12139.1_top_red.jpg

12139.1_top_red

14011.1_bot_bac.jpg

14011.1_bot_bac

14142.1_bot_wht.jpg

14142.1_bot_wht

14142.1_top_wht.jpg

14142.1_top_wht

14142.2_bot_grn.jpg

14142.2_bot_grn

14142.2_top_grn.jpg

14142.2_top_grn

14143.1_bot_grn.jpg

14143.1_bot_grn

14143.1_top_grn.jpg

14143.1_top_grn

14143.2_bot_wht.jpg

14143.2_bot_wht

14963.2_bot_bac.jpg

14963.2_bot_bac

14963.2_top_bac.jpg

14963.2_top_bac

17019.1_bot_wht.jpg

17019.1_bot_wht

17019.1_top_wht.jpg

17019.1_top_wht

17134.2_bot_wht.jpg

17134.2_bot_wht

17134.2_top_wht.jpg

17134.2_top_wht

17172.1_bot_red.jpg

17172.1_bot_red

17172.1_top_red.jpg

17172.1_top_red

17294.1_bot_clr.jpg

17294.1_bot_clr

17294.1_top_clr.jpg

17294.1_top_clr

6417.1_top_blu.jpg

6417.1_top_blu

Photograph Images

12139.1_top_red_0.0012.JPG

12139.1_top_red: Close-up of two achenes with a transition weight

14142.1_top_wht_0.0023.JPG

14142.1_top_wht: Close-up of two achenes with a transition weight

sample10.jpg

sample23.jpg

sample27.jpg

sample28.jpg

sample29.jpg

sample30.jpg

sample31.jpg

sample32.jpg

sample33.jpg

sample41.jpg

sample42.jpg

sample55.jpg

sample56.jpg

sample59.jpg

sample60.jpg

sample63.jpg

sample64.jpg

sample79.jpg

sample80.jpg

sample92.jpg